We earn commission when you buy through affiliate links.
This does not influence our reviews or recommendations.Learn more.
Do you want to capture high-quality videos on your Mac for YouTube or DIY videos?

Are your office colleagues whining about your video conference feed on your Mac?
The camera-sharing occurs usingWi-Fifor wireless broadcasting and USB-C or Lightning cables for wired broadcasting.
Youll see the Authenticate or Trust gadget prompt on both the Mac and iPhone or iPad.

However, both devices must be near each other, Wi-Fi is turned on, and Bluetooth is active.
So, this is how to use Continuity Camera, which is pretty much automatic.
Your devices must meet the following system requirements to use Continuity Camera or iPhone as a webcam for Mac.

These tools enable you to snugly fit the iPhone on the Macs display near the Mac webcam.
So, the video recorded or broadcasted via the iPhone becomes more stable.
Step 2:TapGeneraland go toAirPlay & Handoff.

Step 3: Continuity Camerashould be active by default, but if its not, activate it.
Secondly, ensure the Bluetooth connectivity on both Mac and iPhone is also online.
Heres how to do that:
Step 1:Pull down theControl Centeron the iPhone from the top-right corner.
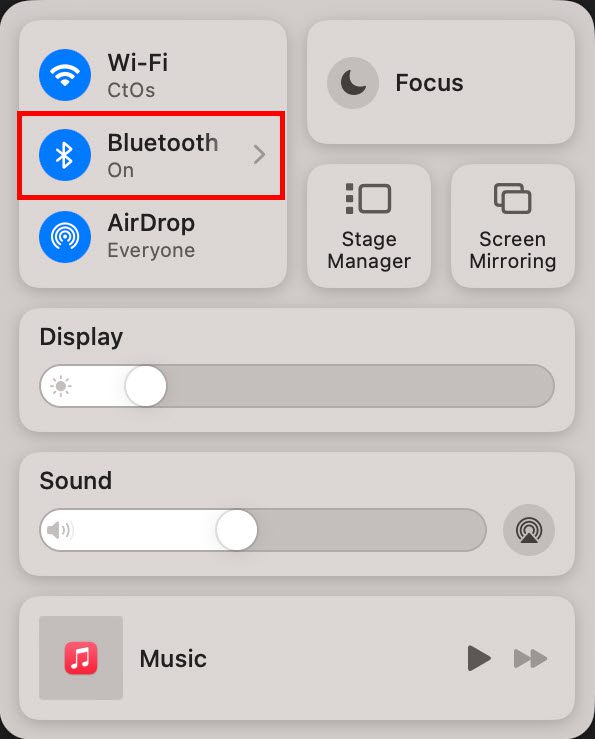
Step 2:Check that theBluetoothsymbol is lit in deep blue, similar to the Wi-Fi icon.
Step 2:TheBluetoothoption should show theOnsign.
Step 1:Pull down from the top-right corner of the screen to accessControl Center.

Step 2:There, long press theWi-Fiicon.
Step 3:On the next screen, you should see the name of the connected Wi-Fi web connection.
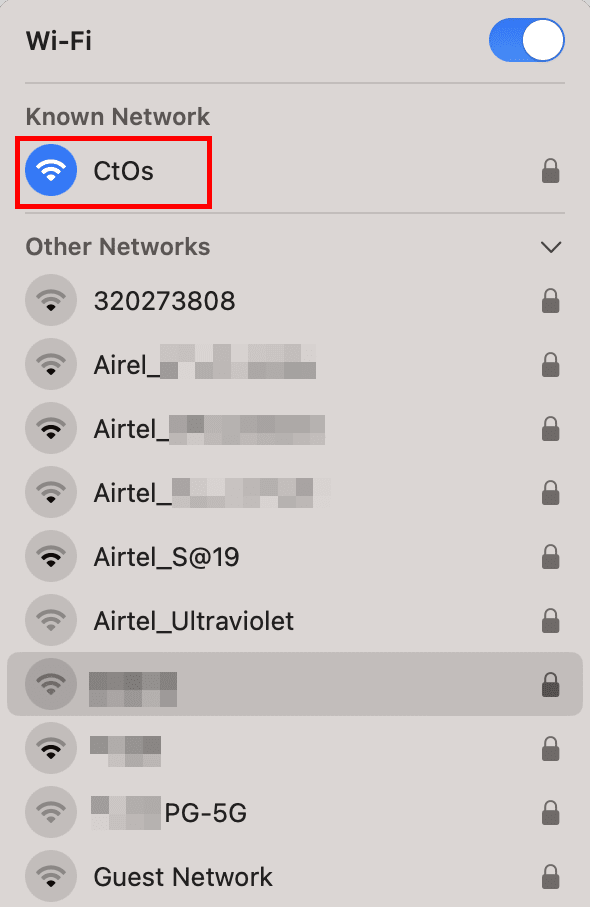
Step 2:Below the Wi-Fi icon, you should see thenetwork nameorSSID.

Step 3:If its not the same as the iPhone, click theoverflow menu arrow.
Step 4:select theOther Networksoption.
Step 5:Choose the same Wi-Fi connection as above from the drop-down list.
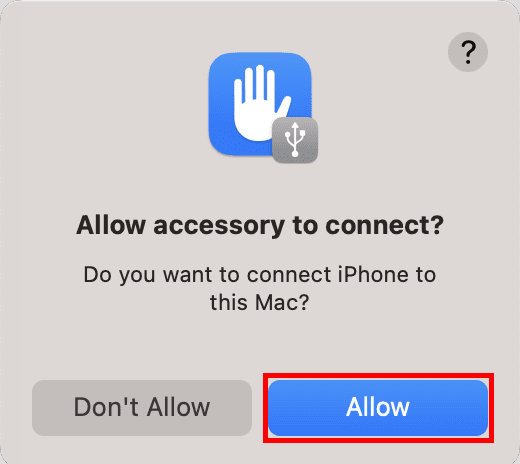
Did you connect your iPhone with the Macbook before?
Step 2:On the Mac, clickAllowon the warning that pops up.
Step 3:On the iPhone, tap theTrustbutton on the pop-up notification.
Step 4:Go to the Mac and open theFinderapp fromDock.
Step 4:Click theiPhonedevice under theLocationsoption on theFinder navigation panel.
Step 6:ClickTrust.

Step 7:You should now see the above screen on your Mac.
This confirms that the iPhone is ready to be used as a webcam for Mac.
Now, using the iPhones high-quality camera as a webcam is super easy.

Heres how:
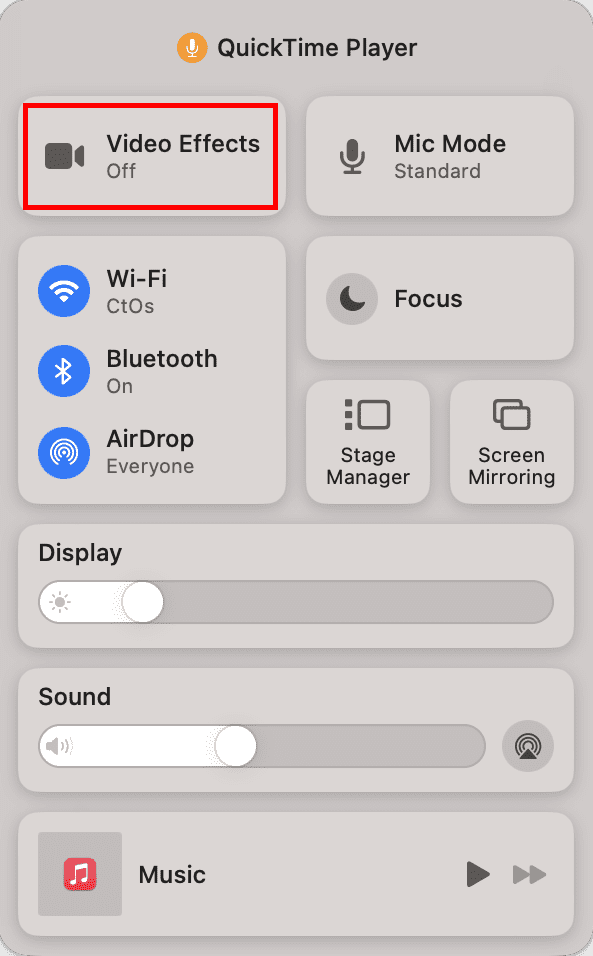
Step 1:Open a Continuity Camera-supported app, like theQuickTime Player.
Step 2:Mount the iPhone on the Mac using the MagSafe Camera Mount accessory.
Step 3:Lock the iPhone by pressing theWake/Sleeporsidebutton.

Step 4:On the Mac, hit theQuickTime Playerinterface.
Step 5:Now, pressOption+Command+Nto start a new video recording.
Step 6:The recording will start using the built-in webcam of your Mac.

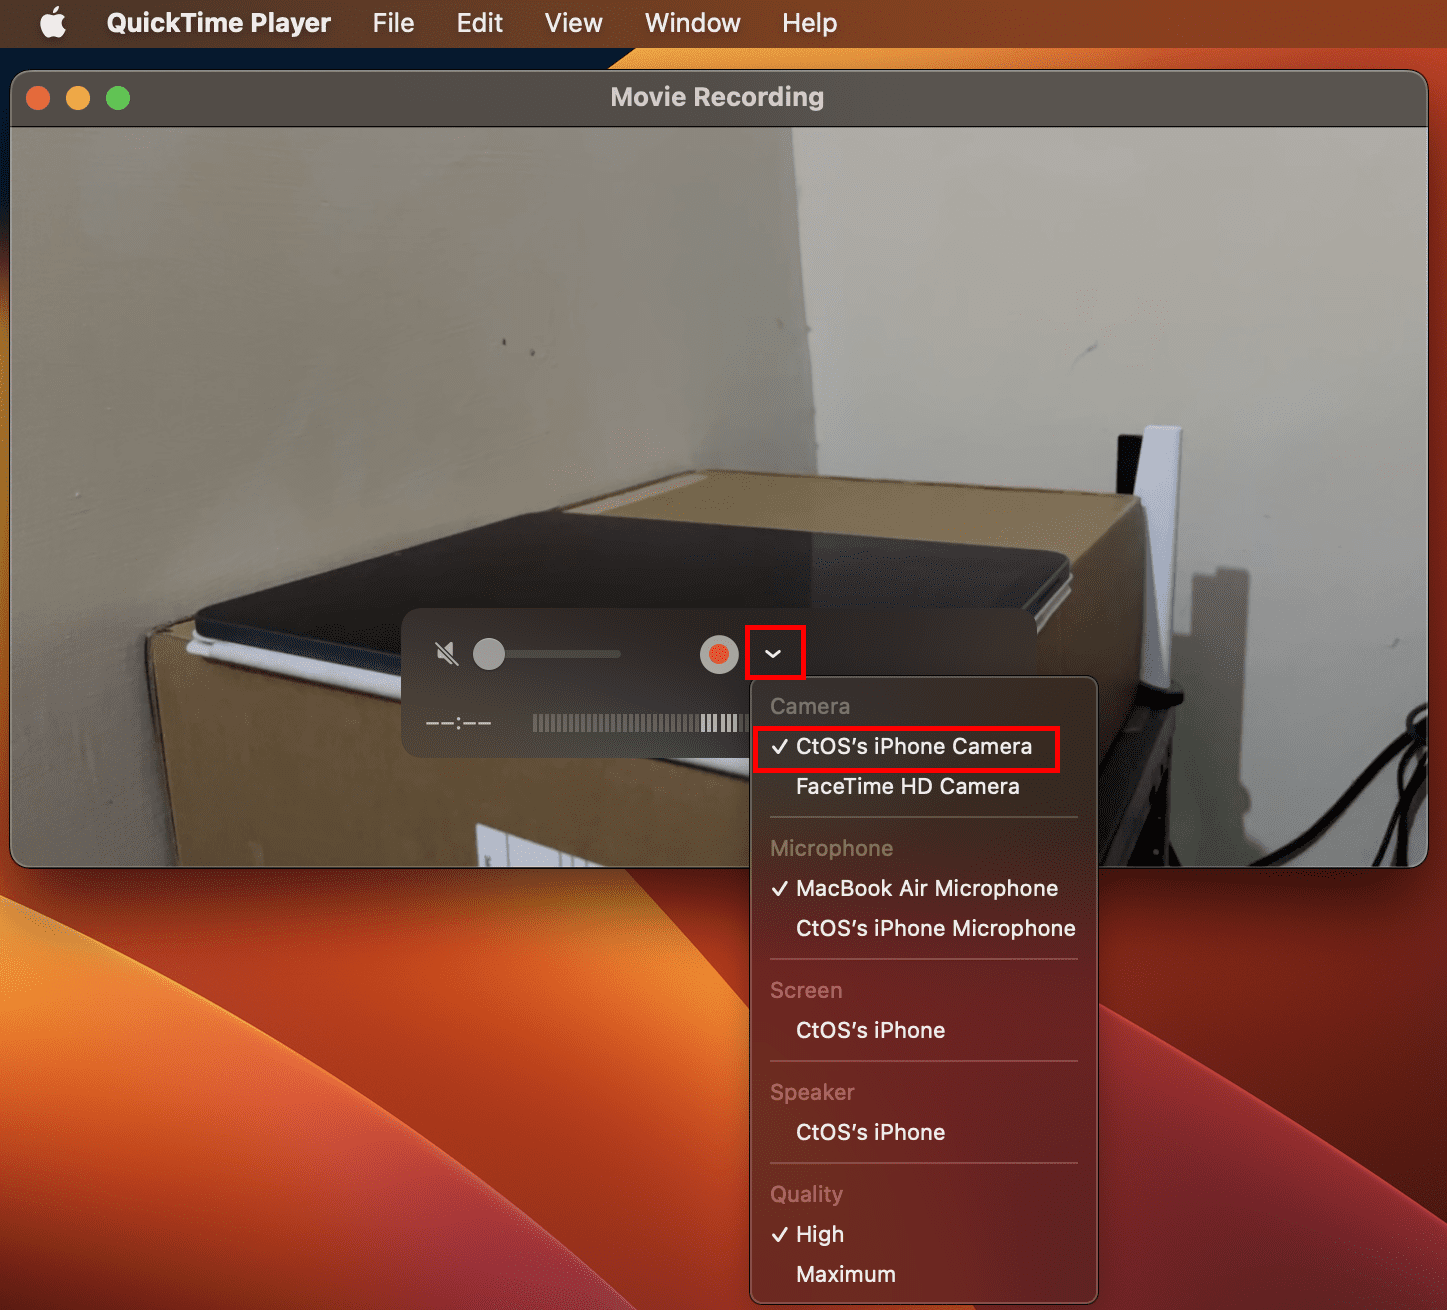
Step 7:Click thedrop-down arrowbeside theRecord(a solid red circle) button.
Step 8:A list of devices will open.
Step 9:There, choose youriPhone.
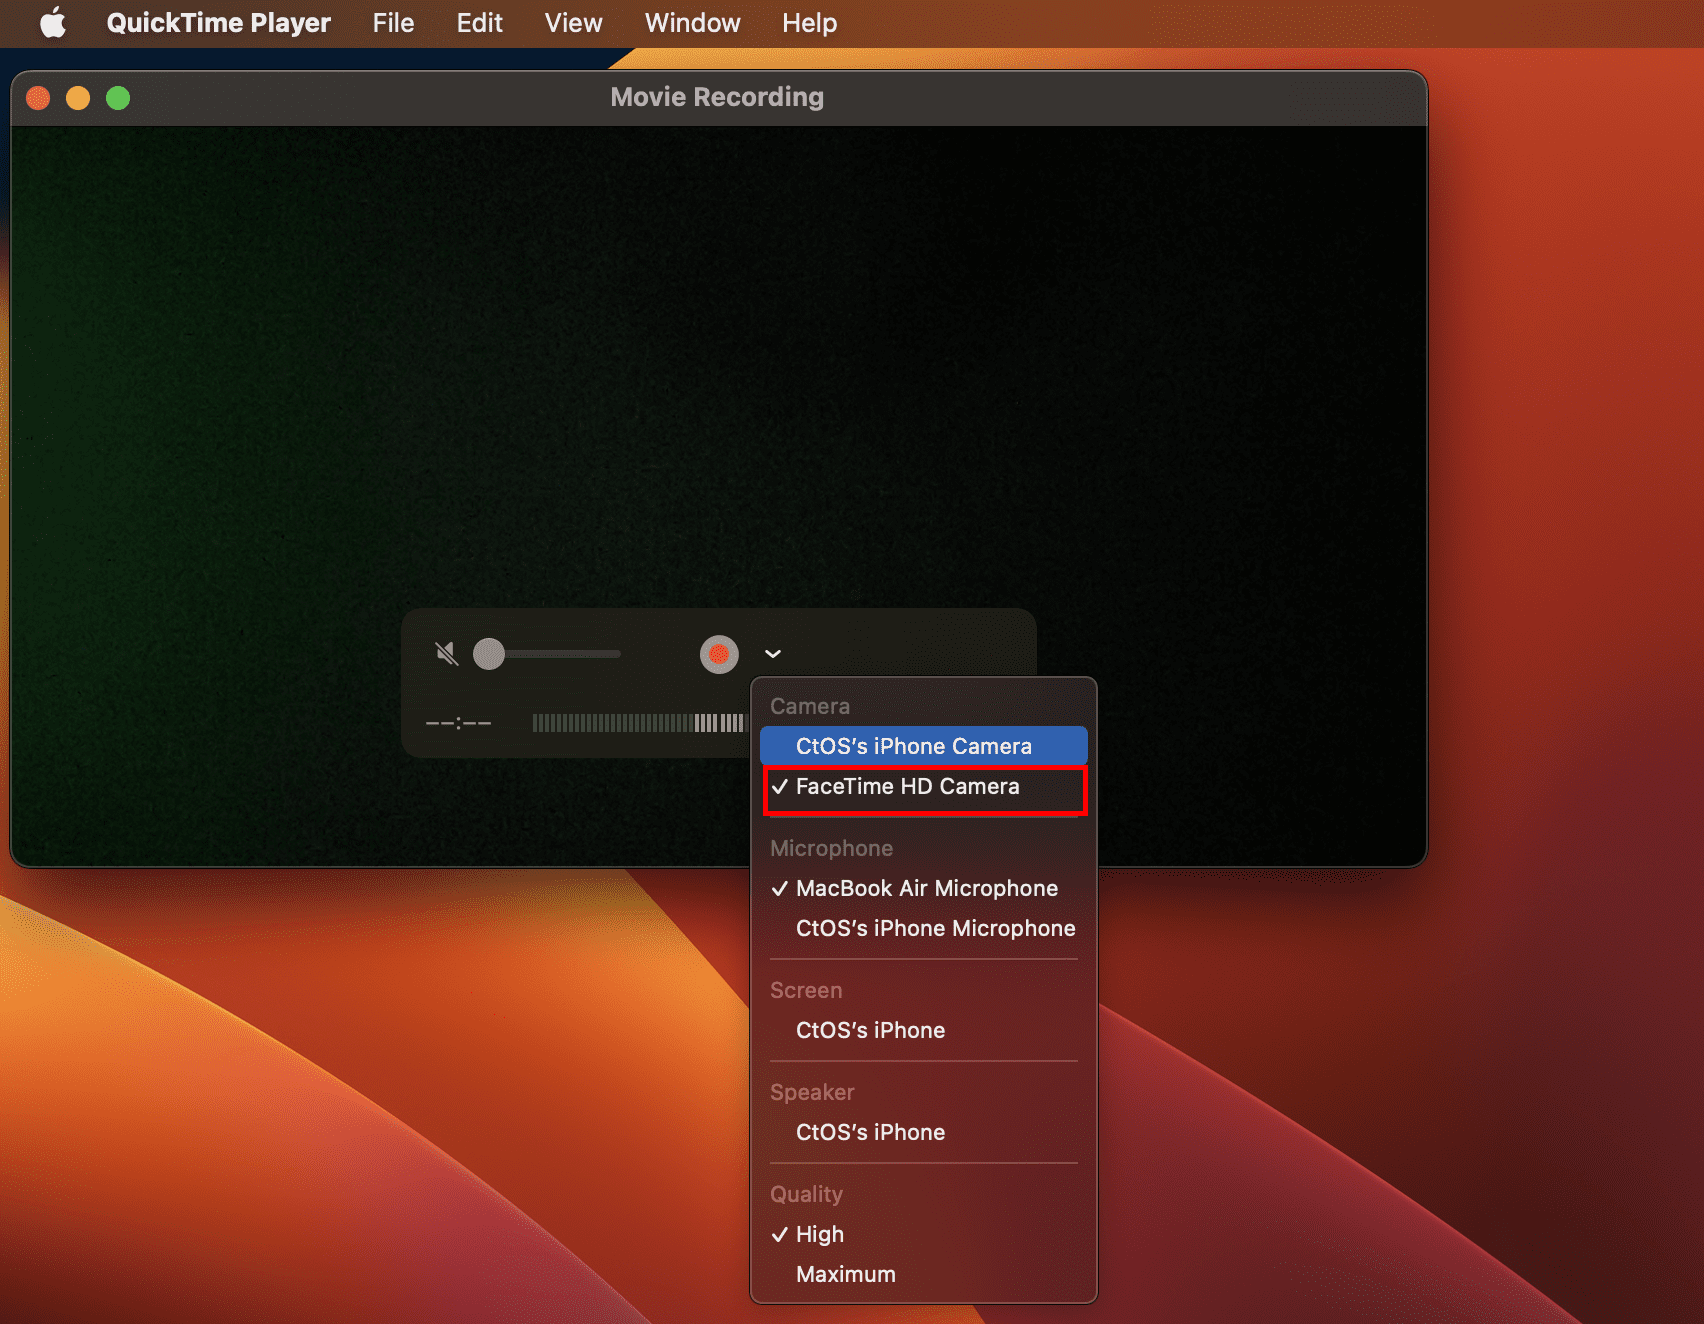
Step 10:The QuickTime Player will start getting video feeds from the iPhone.
Step 11:Click theRecordbutton to start creating your video content.
An alternative way to switch to the iPhone camera feed on apps likeFaceTimeis theVideomenu.
You should see it on the Mac menu bar.
ClickVideoand switch to your iPhone in theCamerasection of the context menu.
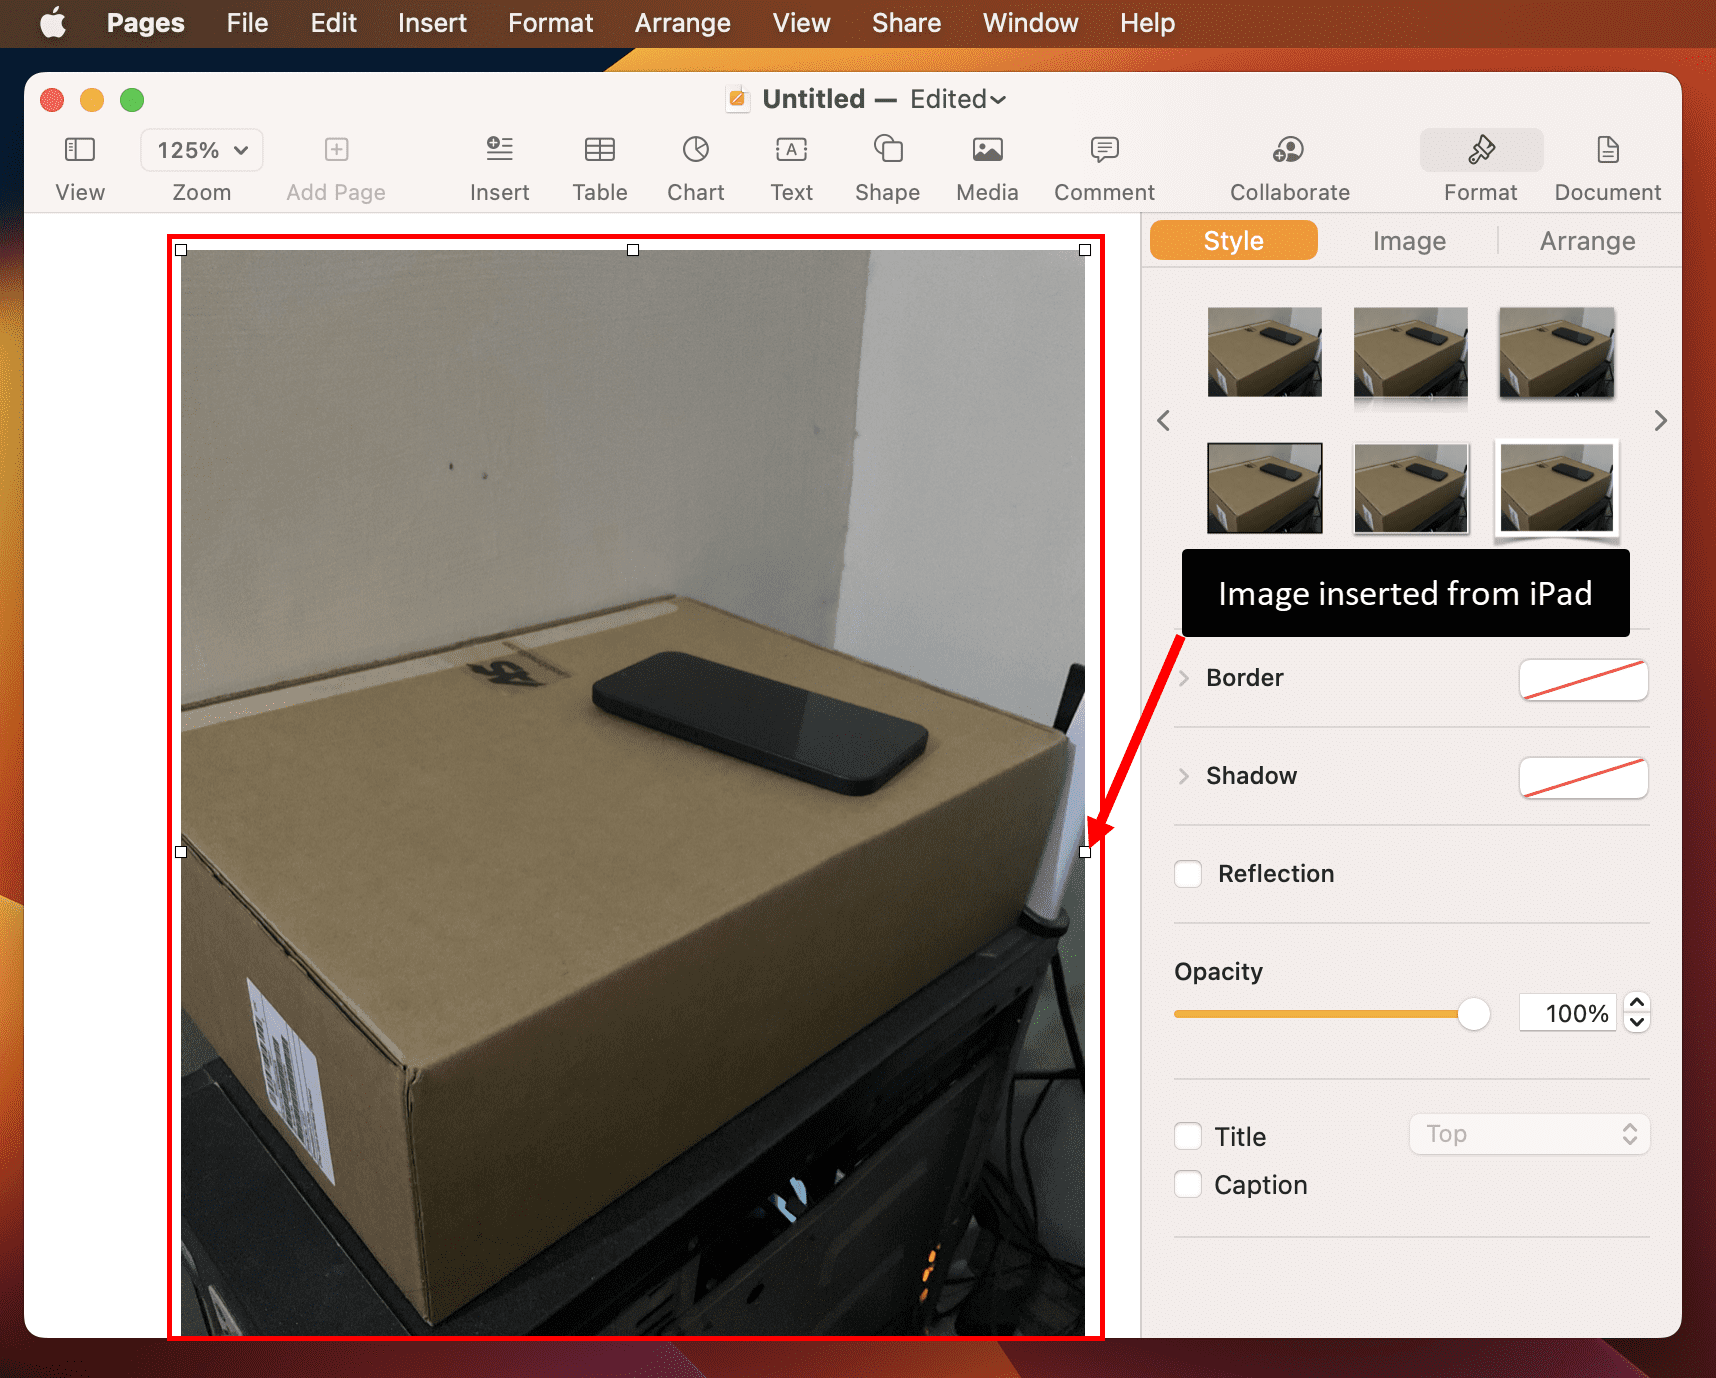
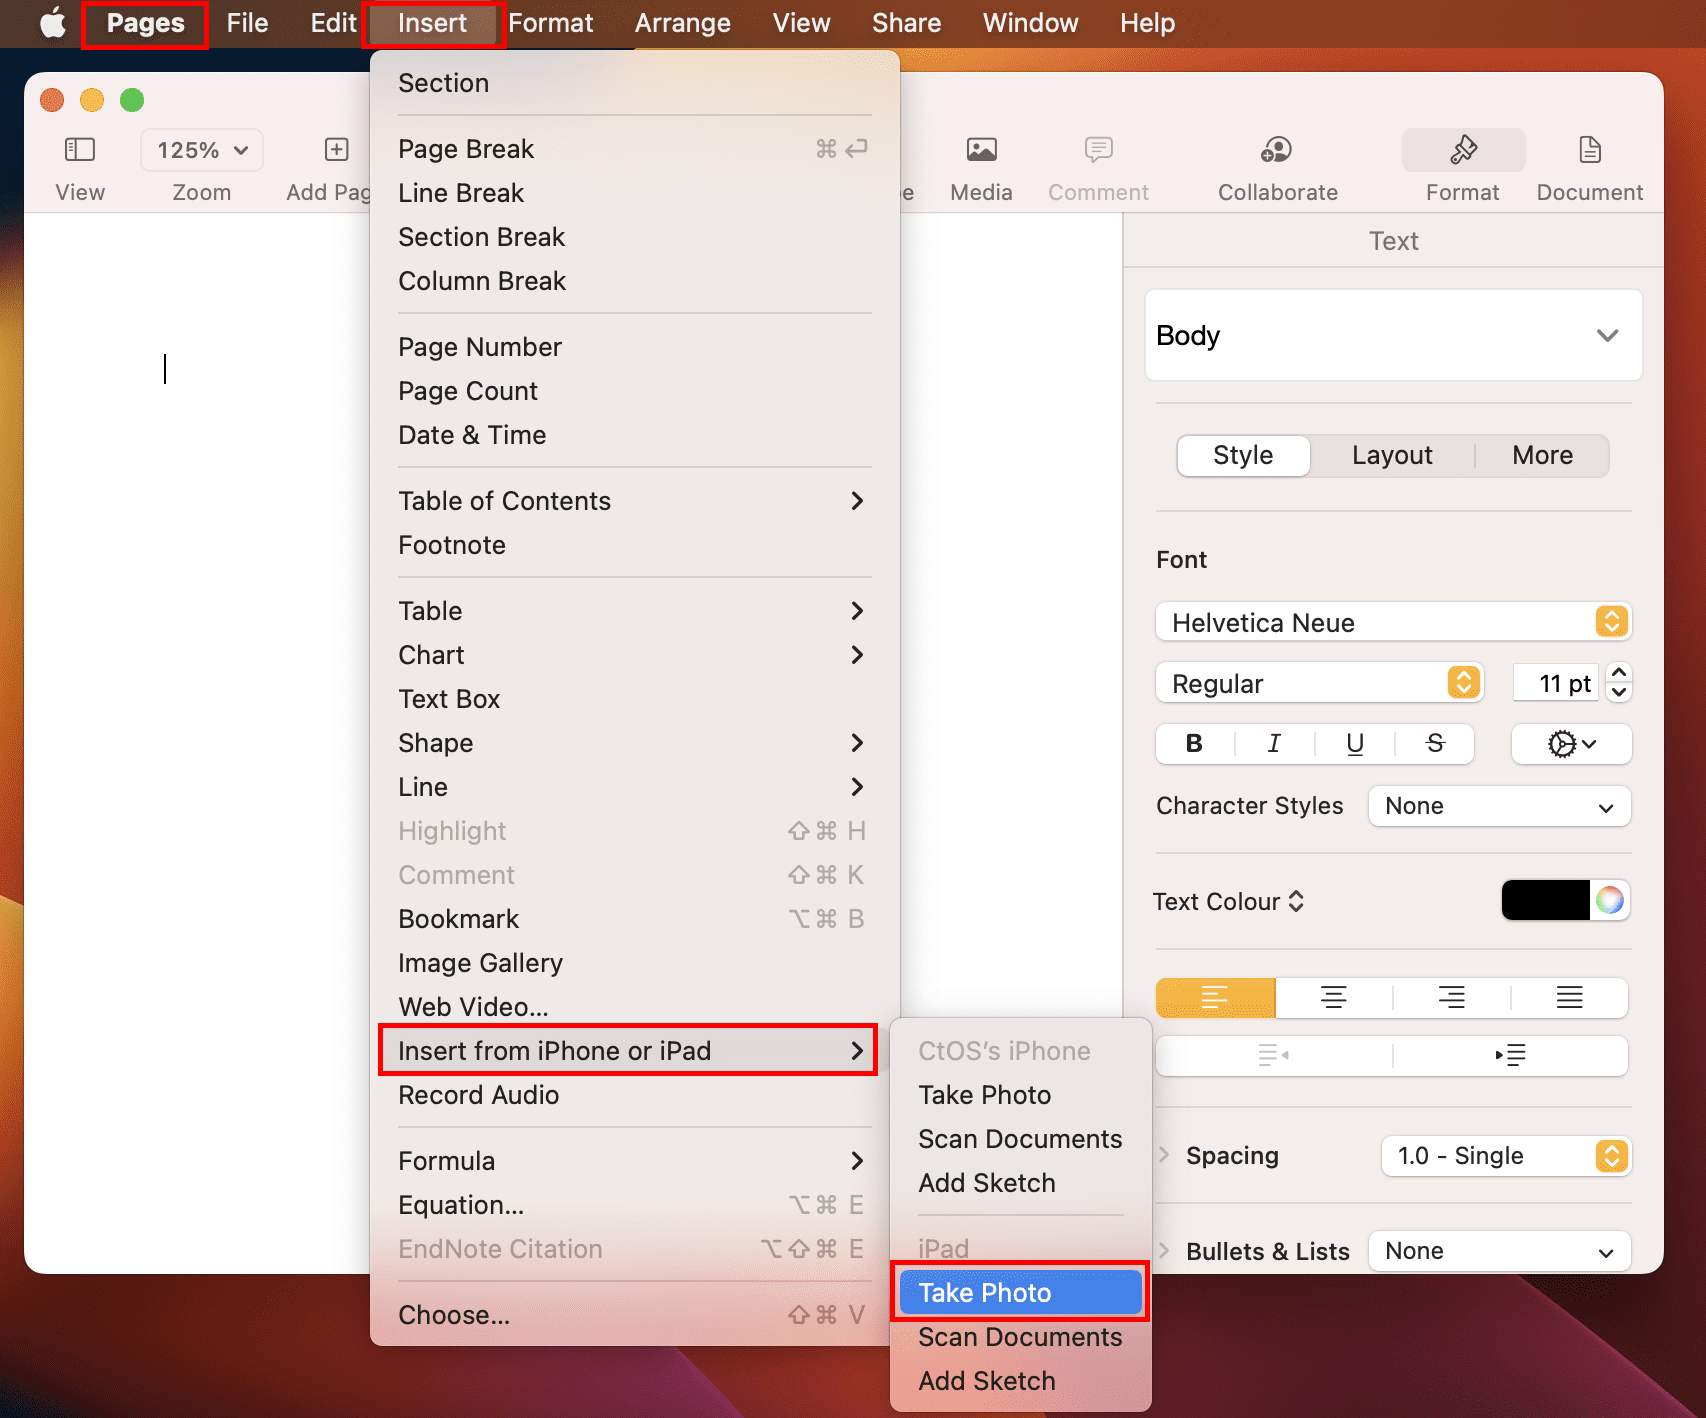
Step 2:Click theInsertbutton on theMac menu bar.

Step 3:Go toInsertfrom iPad.
Step 4:ClickTake PhotoorScan Documents.
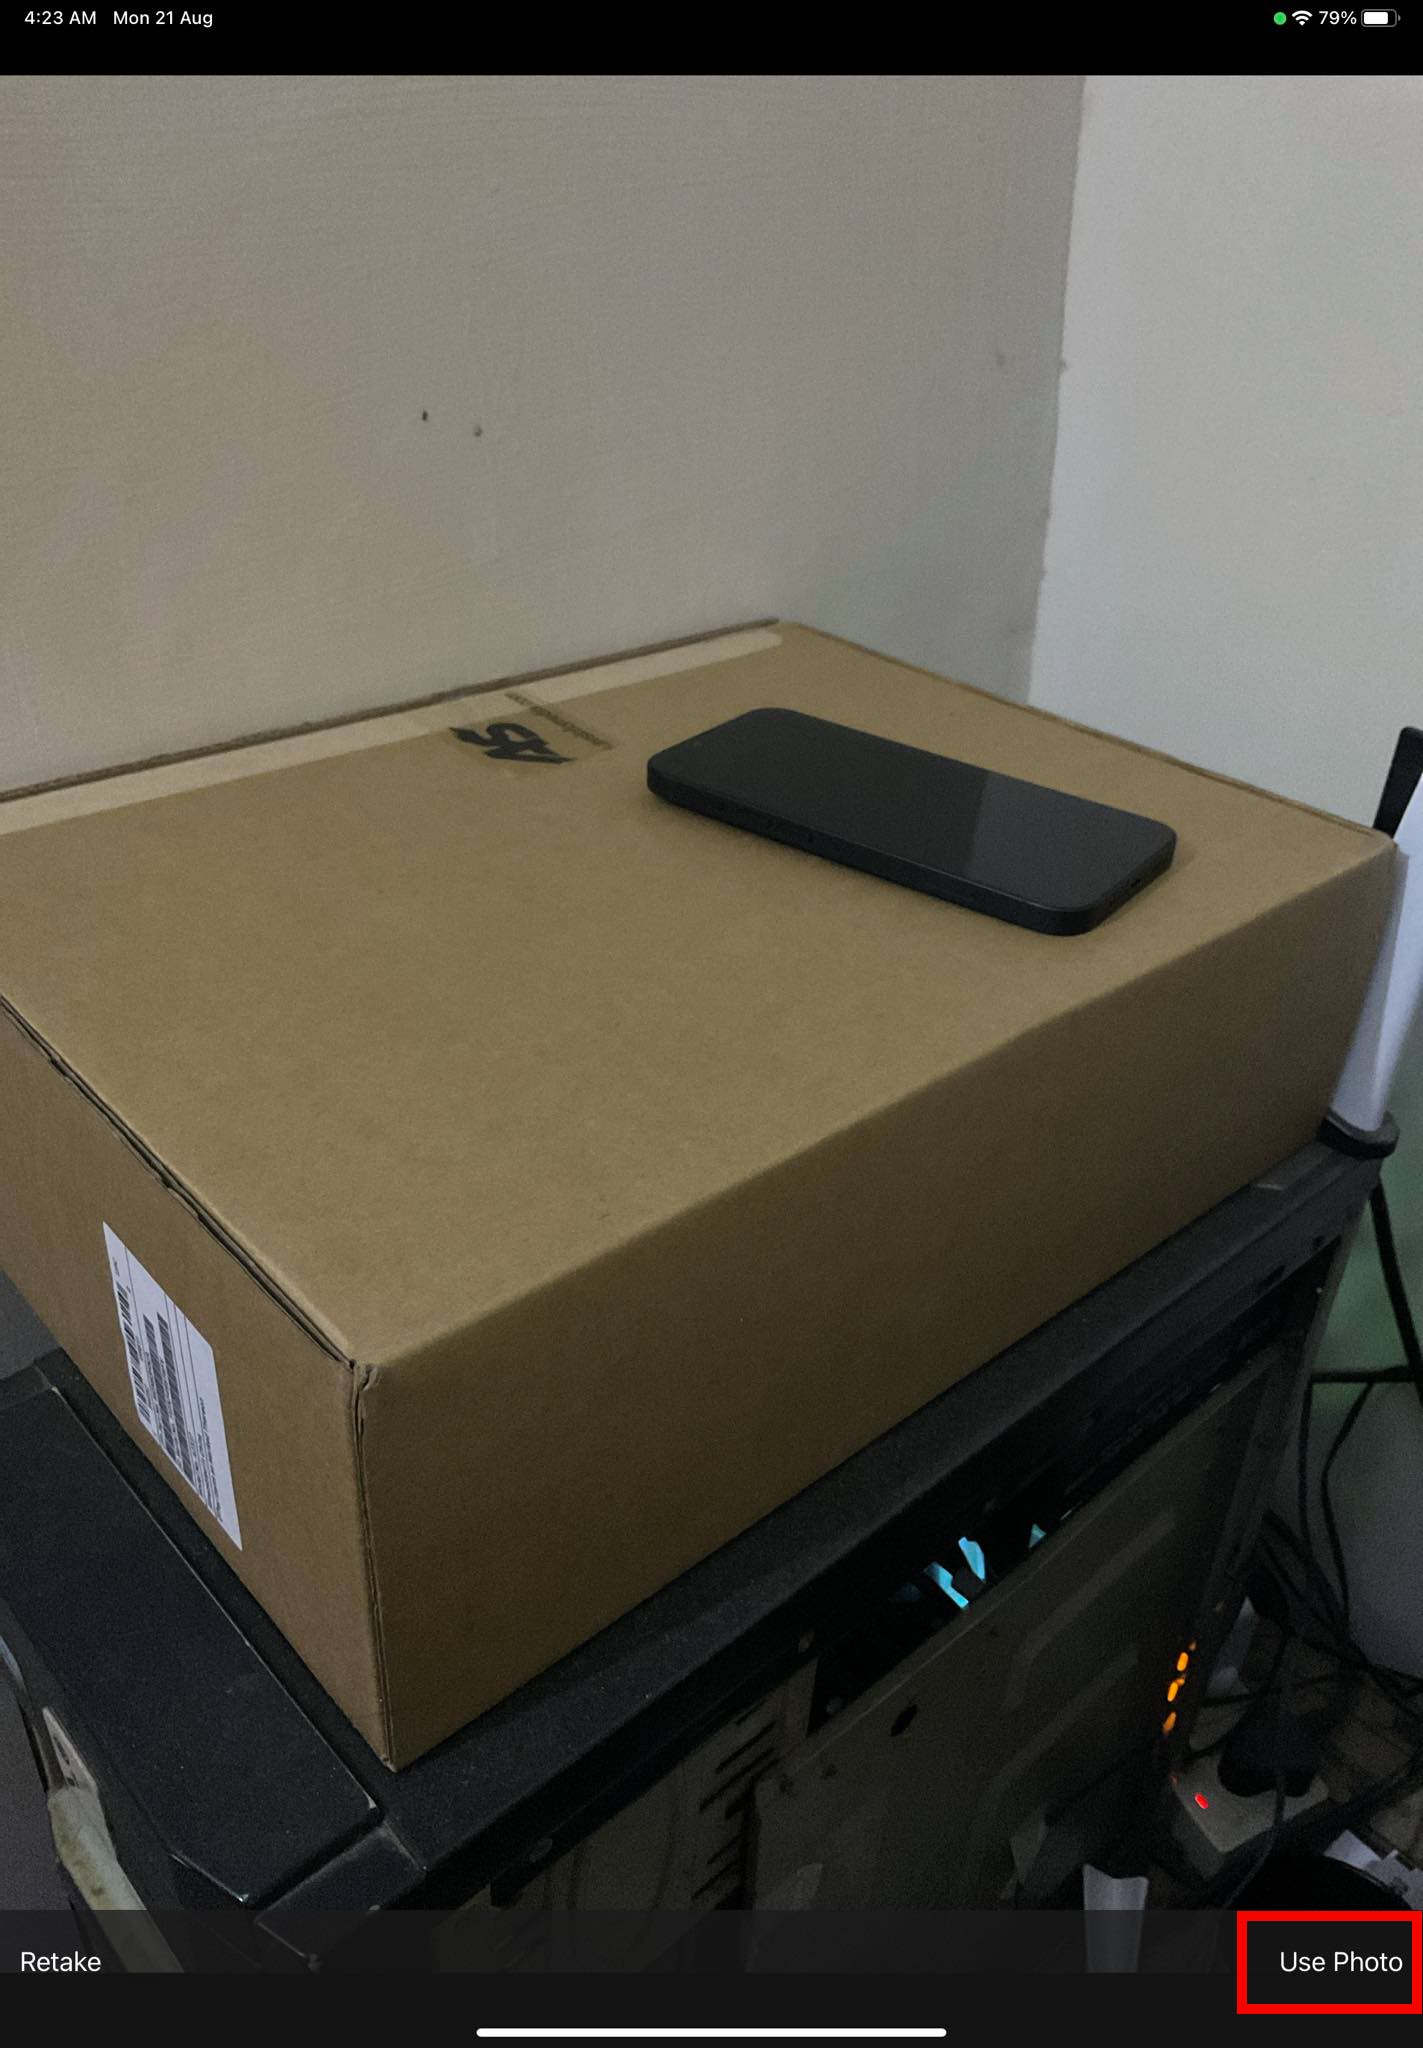
Step 5:Use the camera shutter on the iPad to take the photo.

Step 6:TapUse Phototo insert the image into theApple Pagesapp.
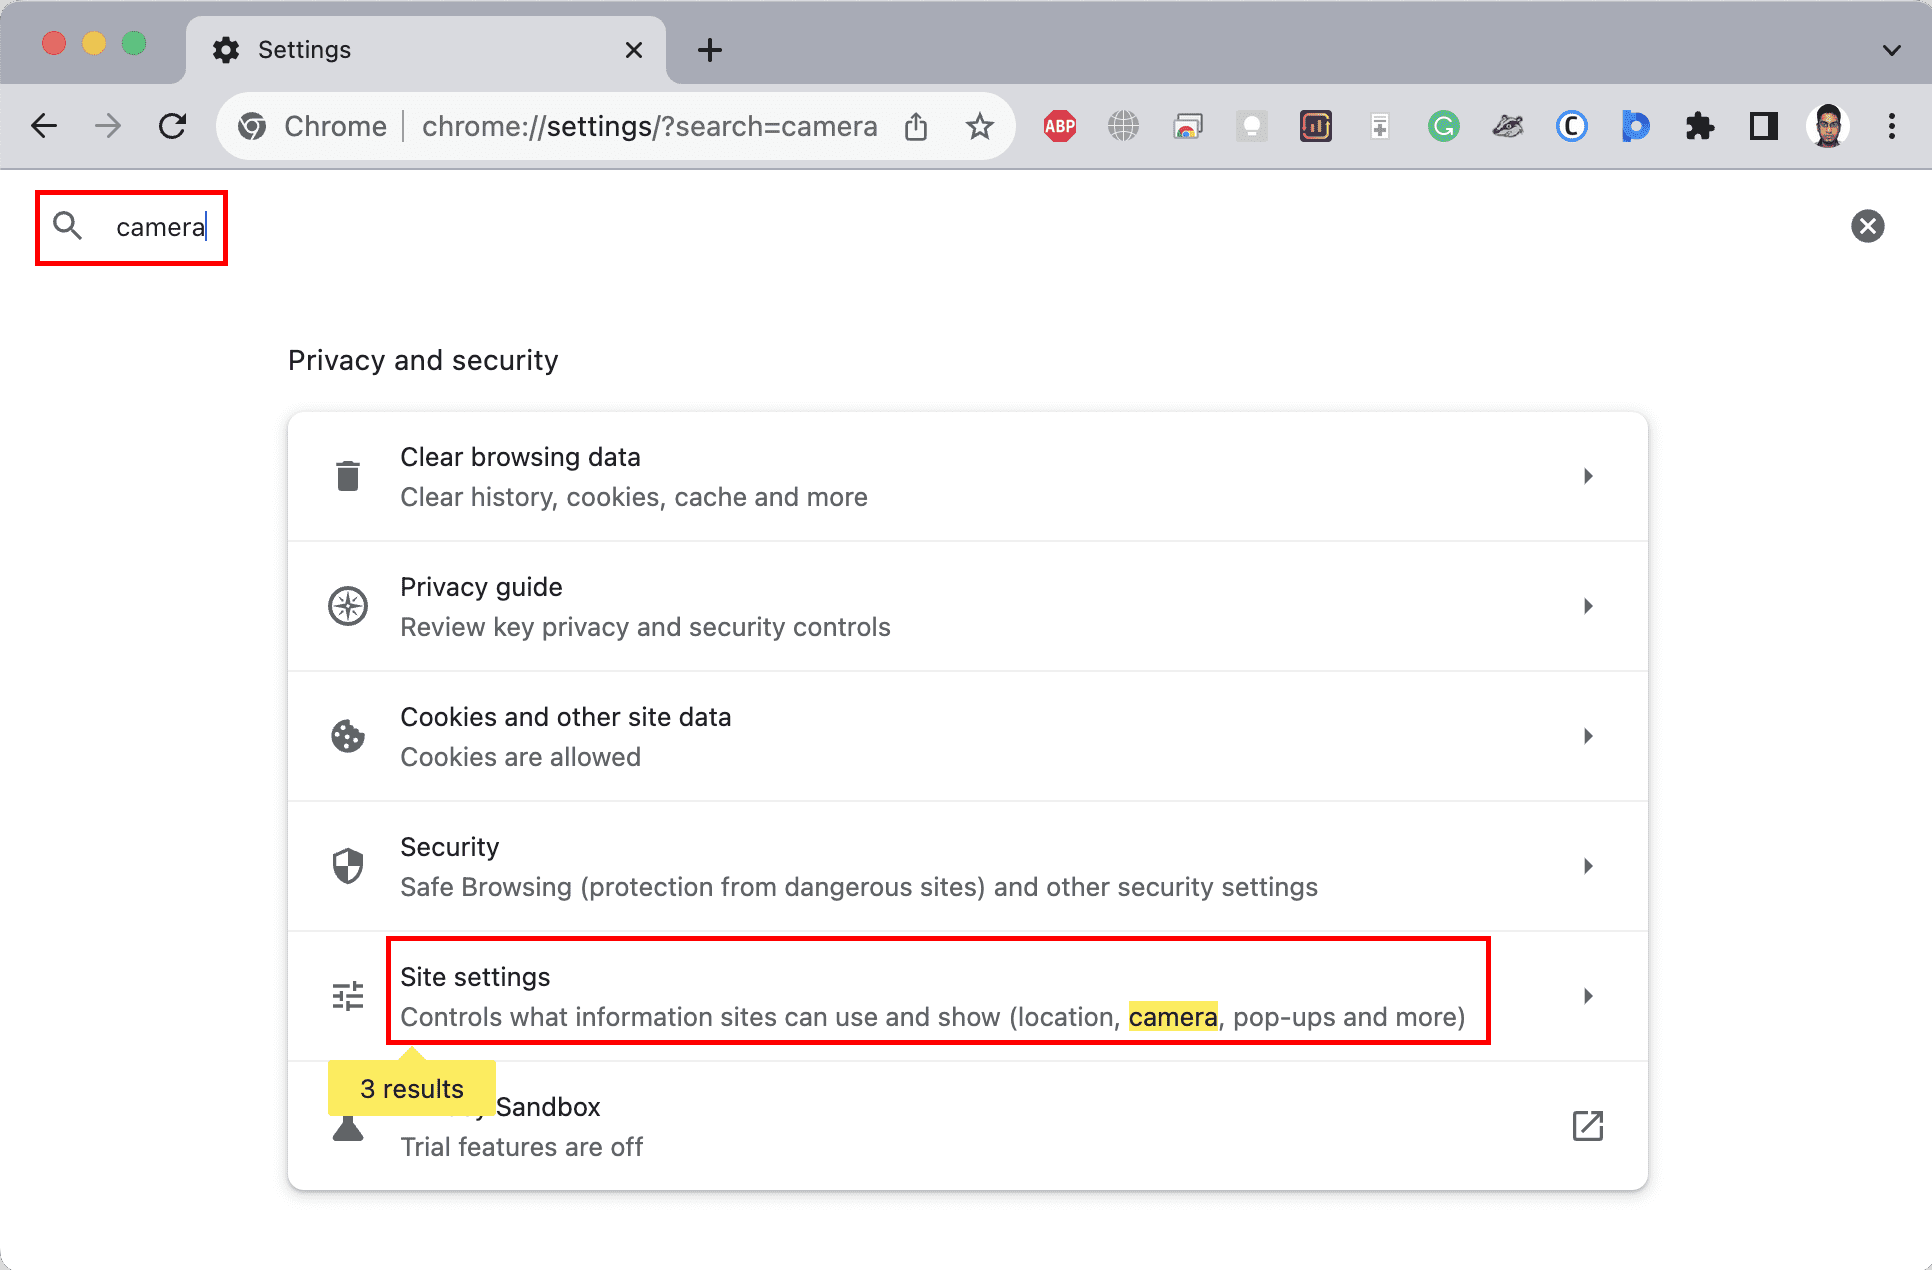
Step 2:Click theSearchbutton and typeCamera.
Step 3:Click onSite prefs.
Step 4:Inside Site controls, scroll down toCameraand pull up the setting.
Step 5:Click theFaceTime HDto switch to your iPhone.
It works using USB and Wi-Fi.
Next, check out thebest video editing software.