We earn commission when you buy through affiliate links.
This does not influence our reviews or recommendations.Learn more.
Creating a web app/ software is more than just coding and getting the app up and running.

Some of the web apps we see were somehow complex to comprehend during the development process.
Luckily, when complex processes, ideas, or concepts are visualized, it becomes easy to digest them.
Keep reading to understand how to create User Stories inJira.

It is worth noting that User Stories are not software requirements.
A User Story is supposed to capture the who, what, and why of a product requirement.
Such stories are brief, where each element contains 10-15 words.
These steps will help ensure the product and the process meet the desired requirements.
Let us now describe the 3Cs to observe when writing User Stories in Jira.
Card
User Stories were originally written on physical cards or Post-it notes.

We now have modern cards we can easily customize when writing User Stories in Jira.
However, the card will contain only some information on the requirement.
A card will have enough information to help you understand the need.

The card can also feature important details such as priority and cost associated with the feature.
The requirement in the User Story needs to be discussed and refined before it is communicated to the developers.
Collaboration is also fostered through conversations between Product Owners, Scrum Masters, developers, and stakeholders.

These conversations can be verbal and, at times, have supporting documents.
Confirmation
Conversations can go on for days or even weeks.
However, there can be an element of doubt, so confirmation is needed.

you’ve got the option to add some criteria that give a specific measure as an acceptance criterion.
These measures can be written as bullet lists within the story.
The confirmation comes in the form of acceptance tests.

The Product Owner defines the acceptance criteria.
On the other hand, developers are tasked with implementing the acceptance criteria.
The user requesting this feature can be an external user, a client, or the product manager.
The User can sometimes be a member of the development after noting a feature that should be worked on.
Such questions will help the product team understand what they are supposed to create.
A common mistake that appears at this stage is presenting a solution.
However, a User Story should not come with a solution.
A feature is not just added to an app, but that feature should add value.
The qualifying statement justifies why the product team should work on the proposed feature.
Thus, there should be incremental value when the developers implement the User Story.
#5.Make the User Story negotiable
The end goal of a User Story can be clearly described.
However, the process of achieving the set goals should be negotiable.
Fill out the details and follow the tutorials to set up your first project.
Once your account is ready, you could now go to step 2.
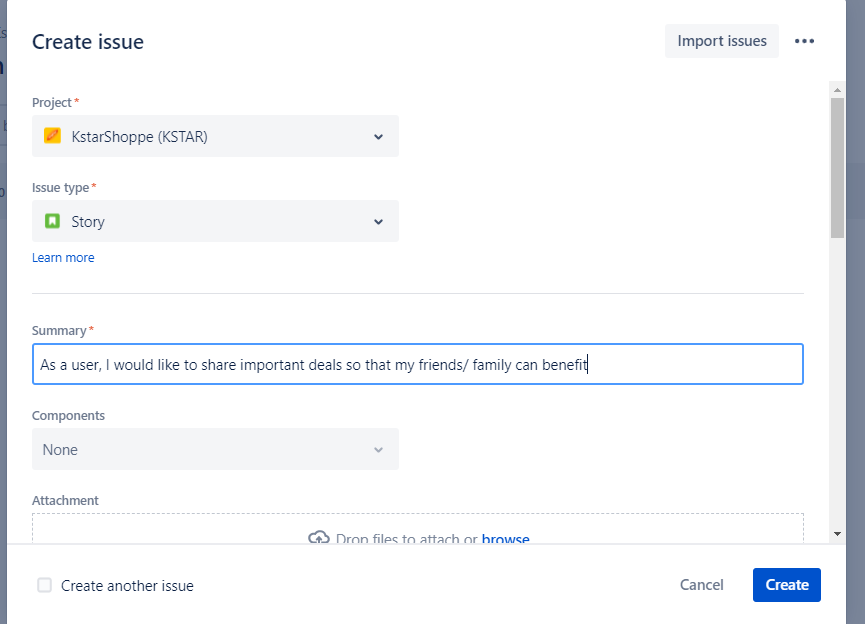
#2.Create an Issue
Issues are used to track individual pieces of work that must be completed.
tap on the Create icon on the top navigation bar of your Jira dashboard.
#3.State your User Story
Describe your issue in the description section.
#4.Attach associated files
Some tasks may require files.
However, our User Story does not have an image, so we will skip that step.
#5.Add a description
This section describes the feature in detail.
In our case, we can describe the social media platforms where products can be shared.
#6.Assign the task
The task is automatically assigned to the Storys creator.
However, you could assign the issue to another person if you are working as a team.
We have selected High for our social media sharing feature.
you’re free to hit the Create button, and your User Story will be ready for viewing.
You may also be interested in this Guide to Agile Methodolgy.
