We earn commission when you buy through affiliate links.
This does not influence our reviews or recommendations.Learn more.
It is ideal for startups, small businesses, and individuals looking for a cost-effective load-balancing solution.

We evaluated essential load-balancing features and calculated a combined overall rating for each.
What is Skudonet?
Skudonet is a leading provider of open-source load-balancing solutions and high-performance program Delivery Controllers (ADC).

Skudonet Load Balancers
Skudonet has two load balancer solutions: Community Edition and Enterprise Edition.
It offers content switching, high availability, and core load-balancing features.
Skudonet Enterprise Edition
Skudonet Enterprise Edition is designed for scalable, large-scale production environments.

This edition provides more robust security features compared to the free version.
Skudonet Community Edition vs Enterprise Edition
This article will focus on the Skudonet Community Edition load balancer.
Well use VirtualBox and Ubuntu as the operating system for this demonstration.

Step 1: Download Skudonet Load Balancer
First, like visit its officialSkudonetsite to get the Download Page.
The download page will present two download sources.
We can use GitHub.
Then, follow the installation prompts.
Step 3: Create a New Virtual Machine
Open VirtualBox and clickNew.
you’re able to also allocate at least 2GB of RAM (2048 MB).

Also, pick the downloaded ISO file (Skudonet from your machine).
Allocate at least 10GB for this virtual disk.
If you are happy with everything, clickfinish.

reboot your rig and then open VirtualBox.
You should now see the virtual drive you created in Steps 3 and 4.
(Depending on your machines configuration, you may be prompted to disableSafe Bootthrough the BIOS.)

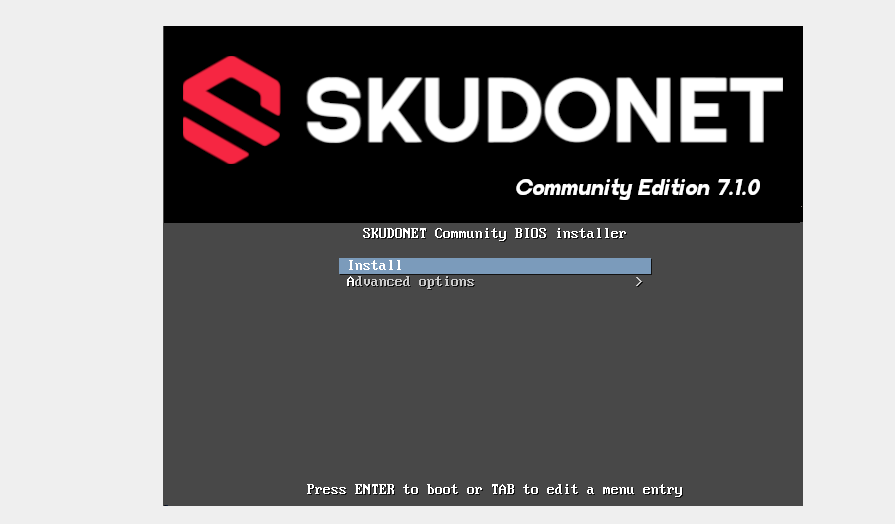
Step 8: Start Installation
ClickInstallto start the installation process.
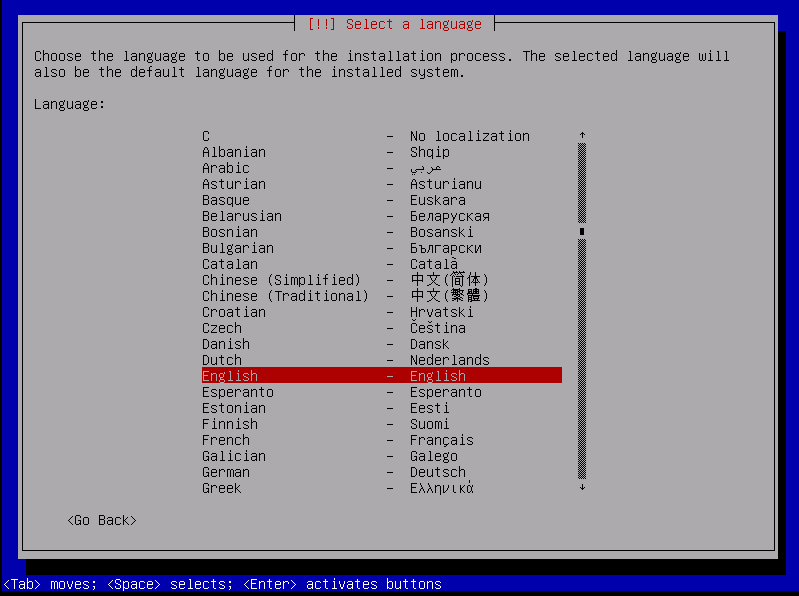
Step 9: Select Language
The installation wizard will ask you to select a language.
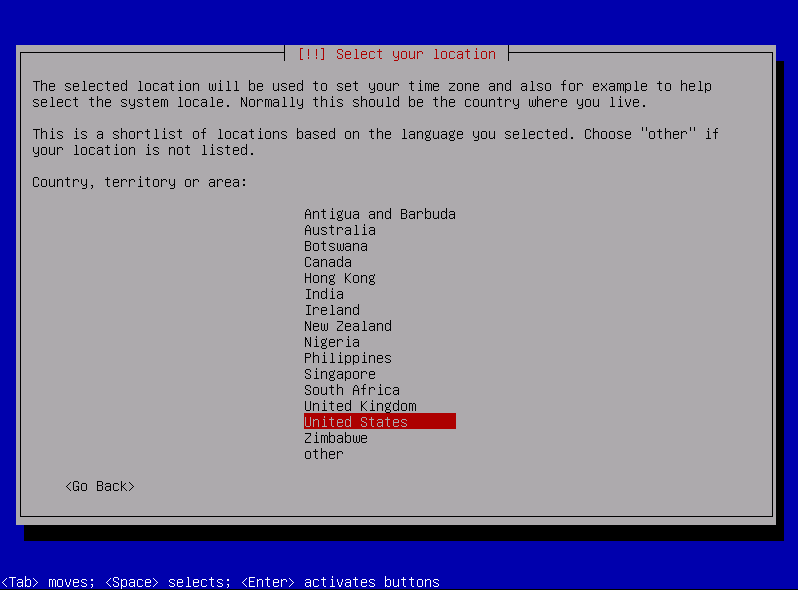
Step 10: Select Location
Choose a location based on your time zone.

If not available, selectOther.
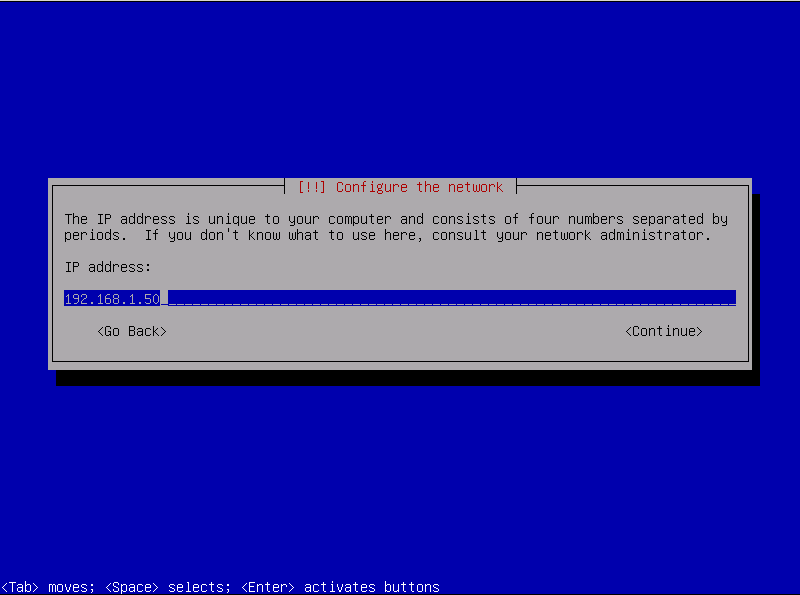
Step 11: Configure online grid
The installer will prompt you to configure a static IP address.
It can be IPv4 or IPv6.

you might use a tool likeWhatIsMyIpAddressor confirm the IP address from your internet supplier.
The web link will also ask for Netmask (consult your internet supplier).
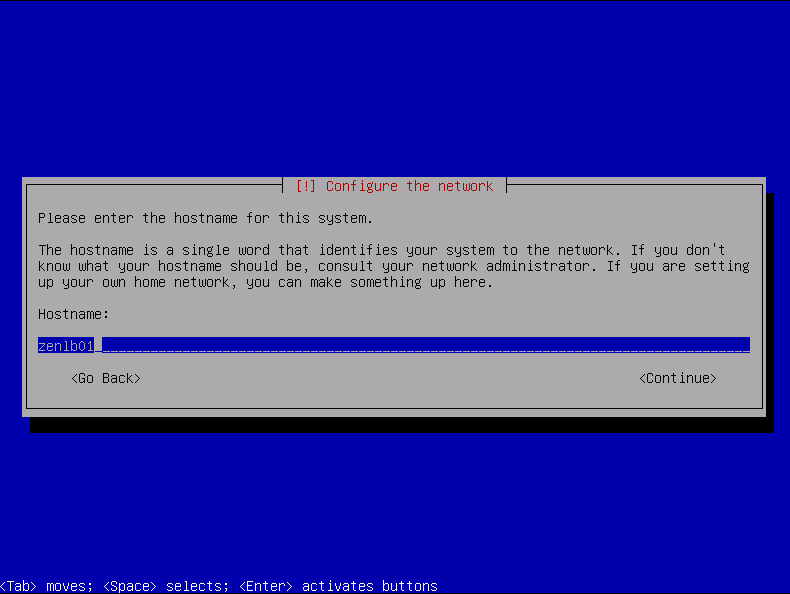
Step 12: Set Up Hostname
Consult your provider to insert your hostname.
Alternatively, you’ve got the option to leave it blank and let the wizard detect it automatically.
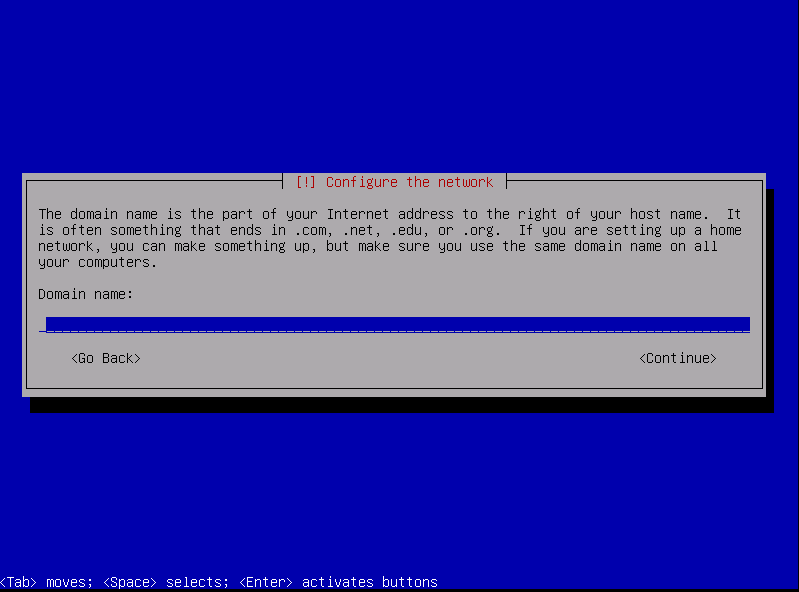
Step 13: Set Up Domain Name
Consult your provider to insert a domain name.
Alternatively, you might make up a name.
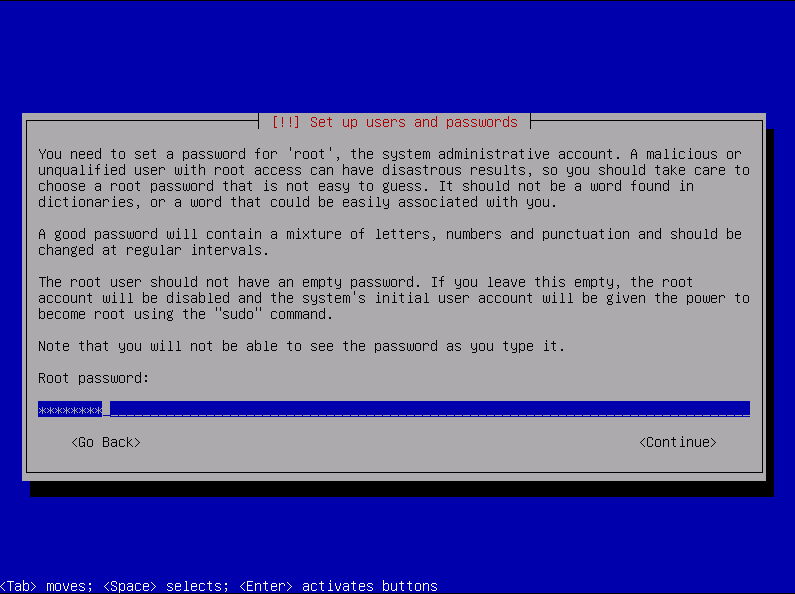
Step 14: Set Up Password
The system will prompt you to set a password.
Create a memorable password and confirm.
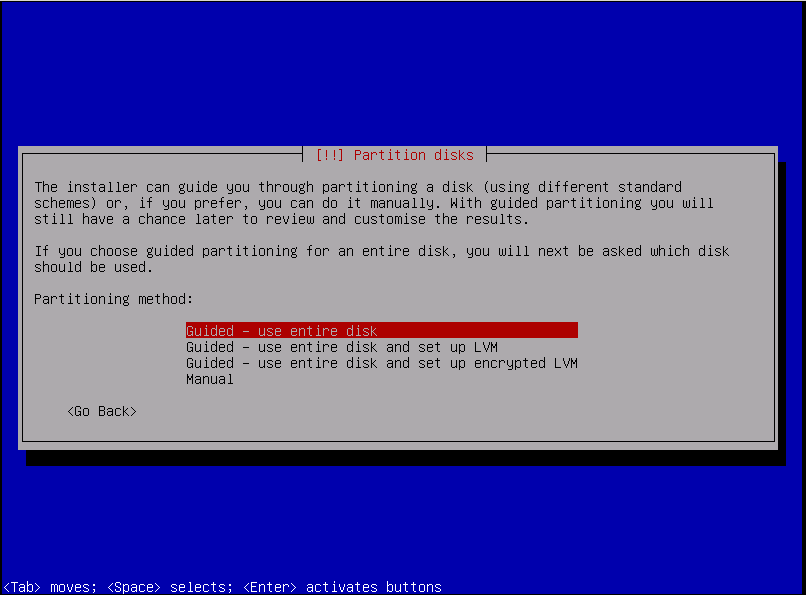
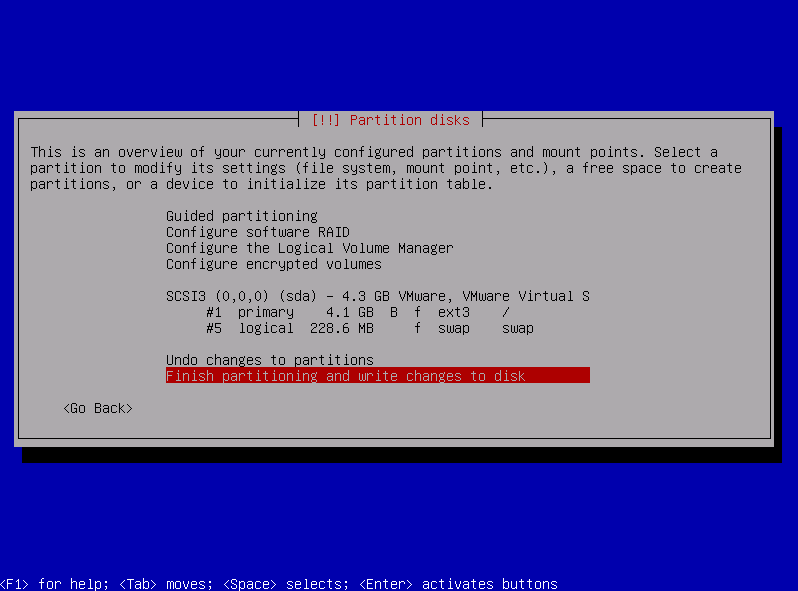
Step 15: Partition Disks
Step 16: All files in one partition
Select all files in one partition.
ClickFinish Partitioningand follow the prompts.
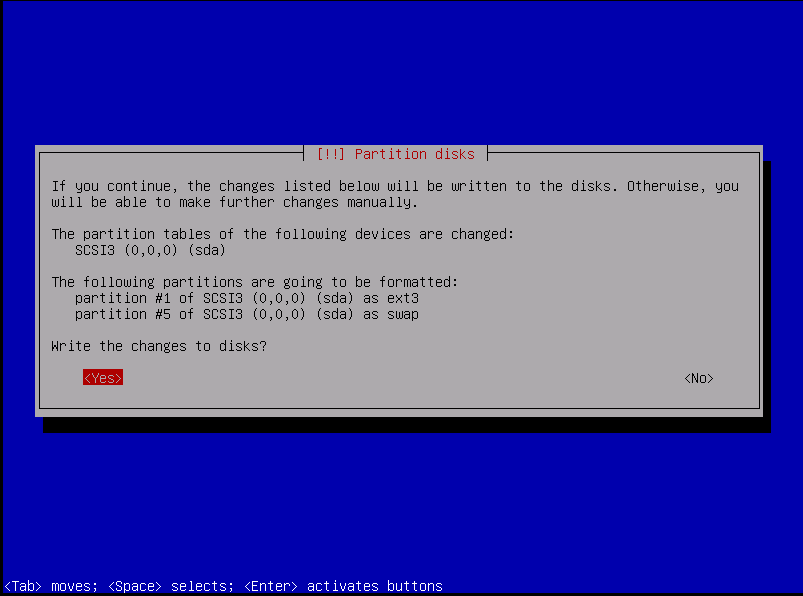
Step 17: Write Changes
This step prompts you to accept the changes to your disk.
ClickYes.Wait for the system to be installed.
It may take a few minutes.
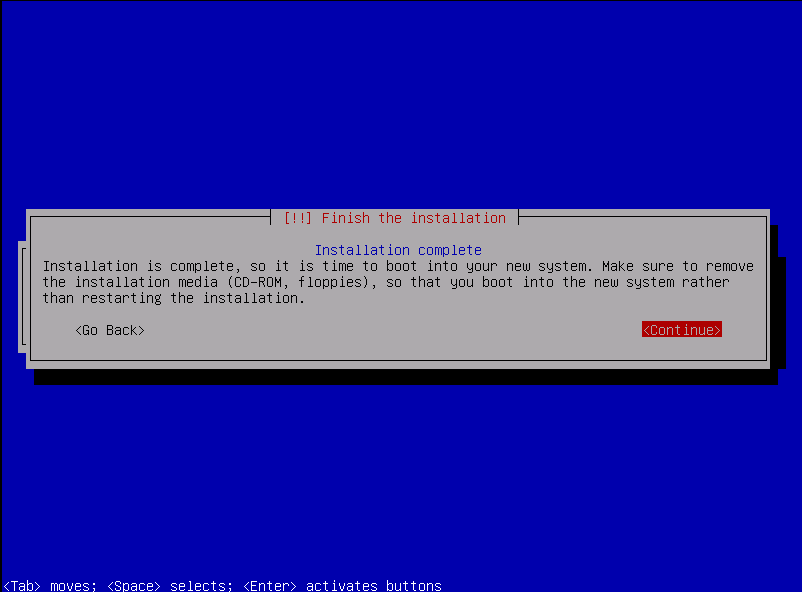
Step 18: Finish Installation.
ClickContinueto finish the installation.