We earn commission when you buy through affiliate links.
This does not influence our reviews or recommendations.Learn more.
This is the place when you want to take Windows customization to the next level.
There are many ways to customize Windows 11, such astweaking default settingsor usingthird-party apps.
However, the Windows registry is the backend that fully controls most things in Windows.
You canmanually backup the registryor use a third-party app for automatic backup/restore.
Alternatively, you canuse the Run commandregeditto open Windows registry.
Dont worry; Ill provide the exact location of each entry for you to easily copy/paste.
It serves no other purpose other than showing a beautiful picture and some extra info about it.
Many people may find this screen an annoying extra step to access your PC.
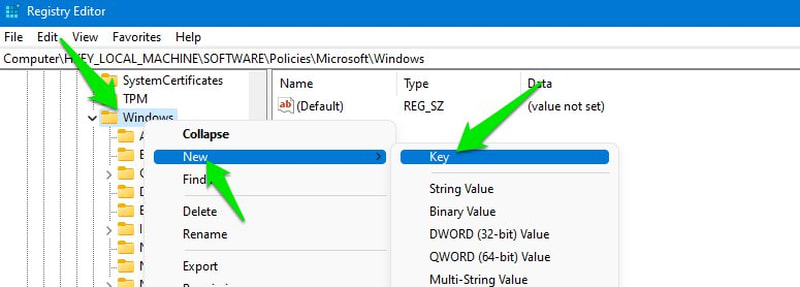
Here right-punch the Windows entry and selectNew>Key.
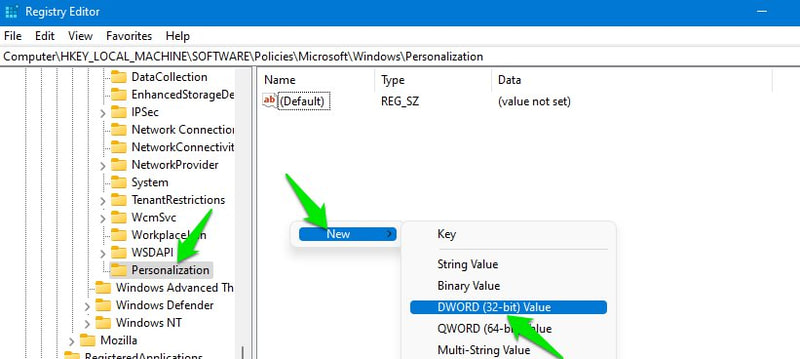
Name this new key Personalization.
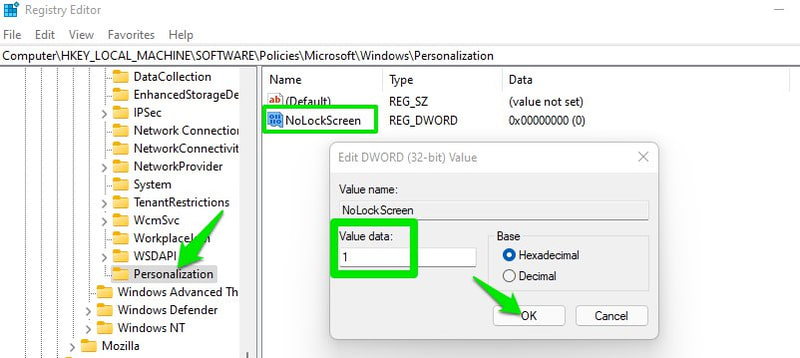
Afterward, double-choose the NoLockScreen entry and change its value from0to1,and clickOK.
Thats it, the next time you will start the PC you will directly see the password screen.
Basically, it tells you exactly what is Windows doing currently which is causing the delay in startup/shutdown.
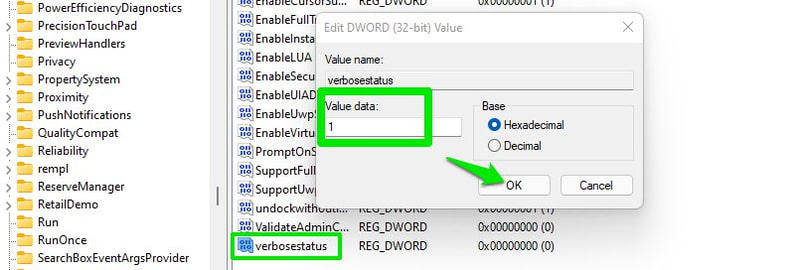
By default, these messages are very limited and wont give all the information.
Heres how:
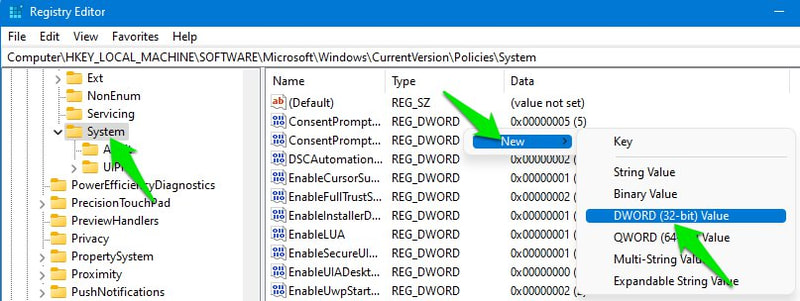
get into the below-mentioned location.
Name this new entryverbosestatusand double-select it and change its value to1.
Why make this a 2-click process when you could just launch the old context menu on the first attempt?
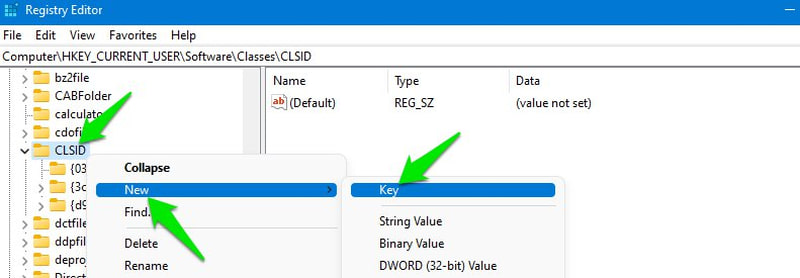
Go to the below location in the registry:
Right-select theCLSIDentry and selectNew>Key.
Name this new key asInprocServer32.
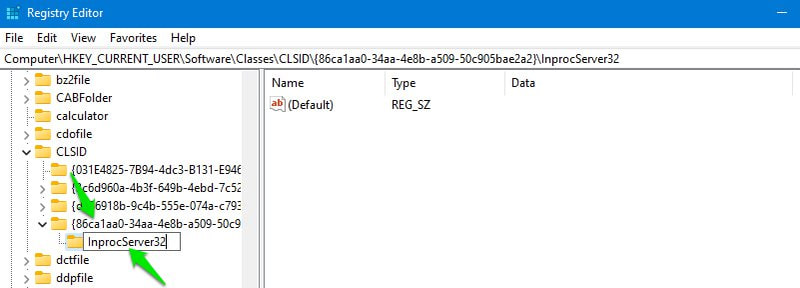
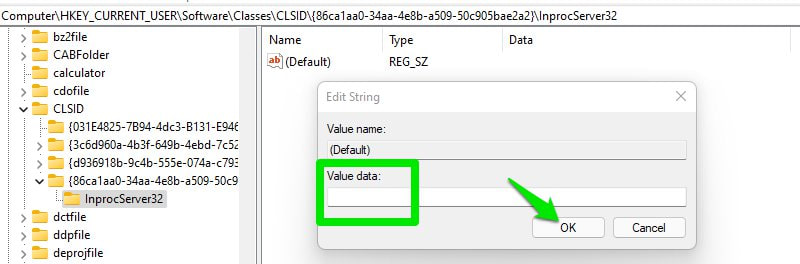
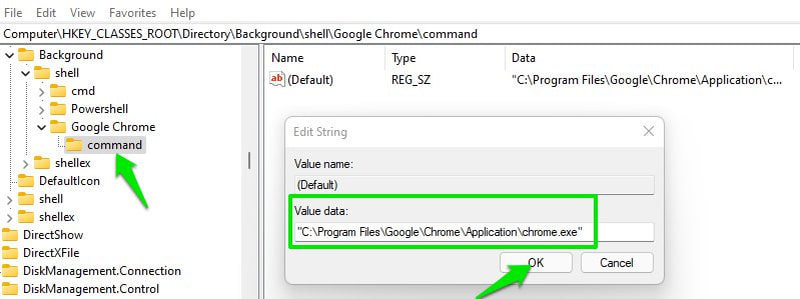
Inside theInprocServer32entry, double-hit the(Default)entry, and without putting any value data click onOK.
This step is very important and the hack wont work without opening and closing this entry.
After the restart, only the old context menu will open when you right-choose empty space or an app/file.
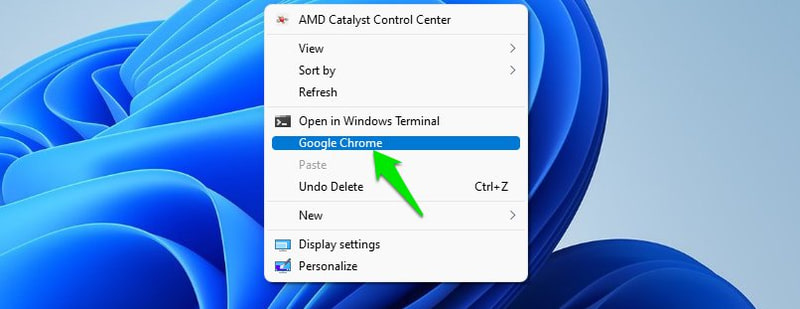
For demonstration, I am going to add a Chrome online window shortcut to the context menu.
Open up the below location in the registry:
Right-click onshellentry and selectNew>Key.
Name this new key as the name of the app as you want to see in the context menu.
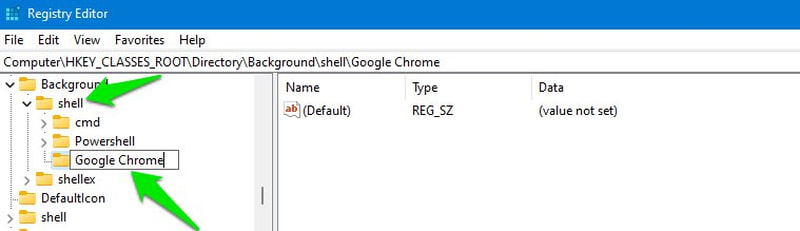
In this case, I am going to name itGoogle Chrome.
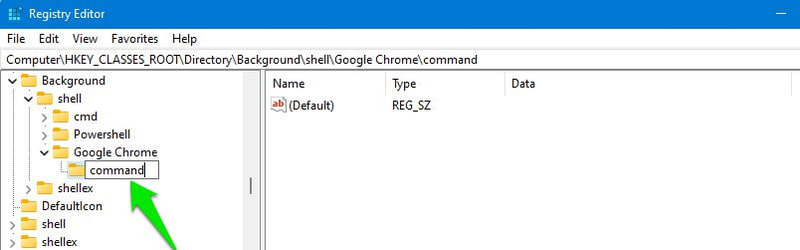
Afterward, right-press the app name entry you created and selectNew>Key.
Name this key ascommand.
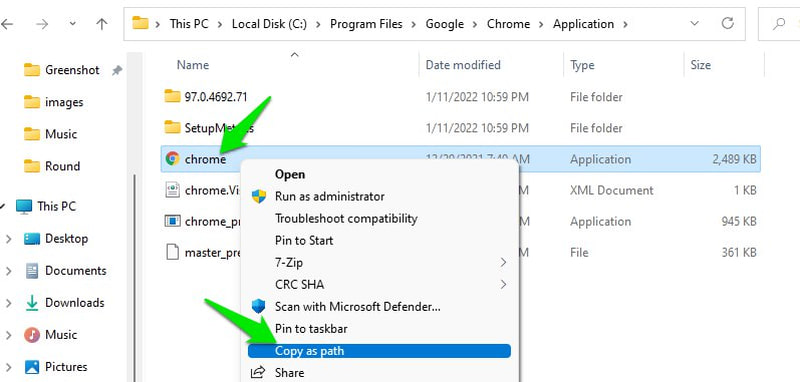
Now we need to add the exact path of the app executable file in this command entry.
Right-smack the app and selectCopy as path.
This will add the app executable to the context menu.
Heres how:
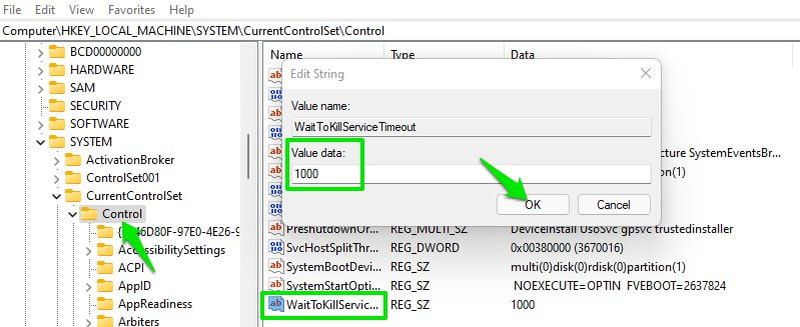
Reach the below-mentioned location in the registry.
Now while theControlentry is selected, look for theWaitToKillServiceTimeoutentry in the right panel.
Once found, double-tap on it and change its value from 5000 to 1000 or lower.
This basically makes switching between two different apps tedious as you have to click twice every time.
Heres how to do it:
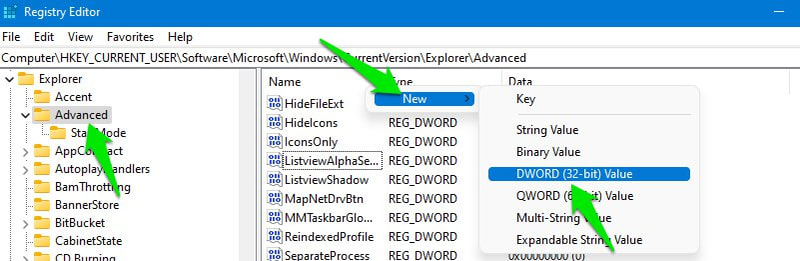
kick off the registry and move to the following location.
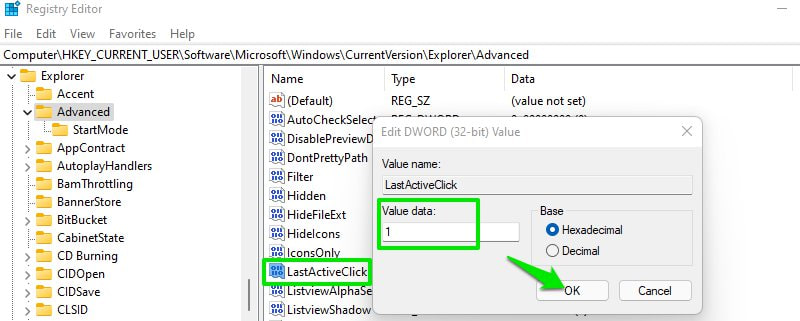
Name this new entry asLastActiveClickand then double-punch it and set its value to 1.
After the restart, the apps last accessed window will open when you click.
Lets get straight to it:
Get to the location mentioned below.
Here 0, 1, and 2 mean small, medium, and large, respectively.
You will have to restart Windows Explorer or the PC to see the changes.
This space is fixed by default and cant be changed from Windows prefs.
In the Windows registry, move to the following location.
While theWindowMetricsentry is selected, you will see many entries in the right panel.
HereIconSpacingandIconVerticalSpacingentries control the space between desktop icons.
IconSpacingmanages horizontal space andIconVerticalSpacingdecides the vertical space between icons.
For reference, I prefer using -1200 space as I usually keep only 20-30 icons on the desktop.
Try out thesebest audio manager and booster apps for Windows 11.
Getting DS4Windows issues on Windows 11?
Heres6 ways to fix it.
