We earn commission when you buy through affiliate links.
This does not influence our reviews or recommendations.Learn more.
rsync is a free-to-use command-line tool that lets you sync files locally and remotely.

With it, it’s possible for you to transfer files and directories.
This article will teach us how Rysnc works and give some helpful examples.
How Does rsync Work?
rsync is a remote synchronization command-line utility for Unix-like systems.
It gives the user the ability to transfer/sync files between machines or two hosts seamlessly.
Under the hood, rsync uses the delta-transfer algorithm.
This algorithm involves copying differences between the two files across two hosts (source and destination).
The source and destination can be local or remote.
The rsync command can carry out copy/sync data tasks in two ways.
These are:
As it is designed to work in Unix-like systems, it also works in Linux.
Lastly, itll ignore existing files on both systems with no modifications.
before you roll:
For the tutorial, were going to useLinux Mint 21.1 Vera.
you’re free to easily follow the guide without issues using any other Linux distro.
Why Use rsync Over Scp?
Scp (secure copy) is a popular command-line protocol that lets users copy files.
It follows a linear approach to copy.
This means it simply copies the files from source to destination.
To securely do so, it usesSSH.
The scp command syntax is as below:
However, the question remains, why use rsync over scp?
Well, therere multiple benefits of using rsync.
These benefits include:
In conclusion, rsync is an excellent incremental sync tool.
The scp tool is also helpful for securely transferring/syncing files.
In a real-world scenario, scp is suitable for day-to-day tasks if youre looking for a more straightforward approach.
However, for recurring tasks, use rsync.
For example, you could sync data recursively with the-r option.
However, the-r optiondoesnt sync ownership for groups and users, timestamps, permission, or symbolic links.
Other rsync options include:
Installing rsync
Most Unix and Linux systems come with rsync installed.
So you could initiate the rsync command in the terminal to see if it is installed.
Itll explain its capabilities, options, and other vital information if it is present.
Lets now see rsync in action with different use cases.
For the tutorial, were going to make two directories.
For that, it’s crucial that you bang out the following commands.
Also, well need to generate files to make rsync work.
So lets create some test files with the command below.
This creates 100 empty files in the source directory.
it’s possible for you to confirm it by entering the command below.
Note:We have kept the dest-directory empty.
In this case, well use the following rsync syntax.
rsync option SOURCE DESTINATION
Copy the files in oursource-directoryto thedest-directoryby running the following command.
Here, the command recursively copies the files from thesource-directoryto thedest-directory.
This copies every single file in thesource-directoryto thedest-directory.
To edit a file, key in the following command.
Now copy-paste the following text into the nano editor.
Now, close and save the file.
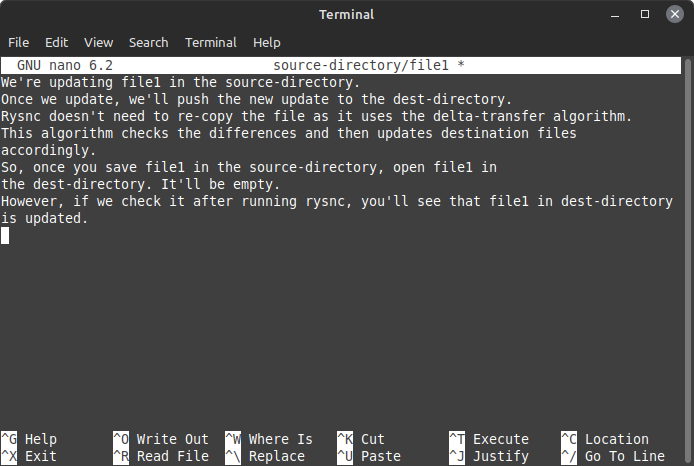
Lets now copy the file using rsync.
As you might have noticed, we usedexistingoption.
This updates the existing files.
If you spin up the command withoutexisting, itll not update, even though it runs successfully.
For this purpose, well create two new files:newfile2andnewfile3, in thesource-directory.
initiate the following command to do so.
Now, use the following command to sync multiple files.
Also, you should probably add the IP address after the source file.
Before starting the transfer, itll ask for the password.
Enter it to continue.
If you intend to copy multiple files or directories, then you better list the files or directory paths.
The syntax for it is below.
Remote Transfer-Specific Protocols
rsync lets you specify specific file transfer protocols.
To do so, you gotta use the-e option, followed by the protocol.
For example, if you want to use the ssh protocol, you must append-e sshto the rsync command.
Copying a File or Directory From Remote to Local
This acts as a pull request.
The command pulls the files within the remote machinesdest-directoryto the local machinessource-directory.
Similarly, you’re able to pull a specific file by mentioning it through its full path.
Similarly, you’ve got the option to mention files as well.
Show Live Progress During Transfer
It is a good idea to see live progress for largerdata backups.
For that, you gotta use theprogressflag.
rsync dry run
Rysnc also lets you evaluate before you do an actual run.
The dry run lets you see if youre doing the right thing.
After all, you dont want to update files by mistake or even delete them.
you should probably use thedry-runoption to do a dry run.
Add it to the command, followed by the source and destination.
The output is similar to how we ran it before.
However, youll notice a mention of(DRY RUN)at the end of the output.
The command will only copy files with a minimum file size of 15KB.
If the file size is below, itll ignore it.
Similarly, you’ve got the option to use themax-size flagto set the maximum file size.
Here, rsync will ignore files above the 450K size.
To do so, use thebwlimit=KB/s.
Here, we set the bandwidth to100Kb/sduring the transfer.
Final Words
This leads us to the end of our rsync command guide.
We learned how to use rysnc and covered plenty of commands effectively.
However, rysnc offers way more than what we covered.
Next, check out command line cheat sheets for Windows, Linux, and macOS.
