We earn commission when you buy through affiliate links.
This does not influence our reviews or recommendations.Learn more.
Implement Google Consent mode v2 with iubenda to remove all the blind spots in your conversion data.
What is Google Consent Mode v2?
The founding piece of Googles tracking technology is its tags.
Placed in the source code, they help analyze the visits to track conversions.
As per modern privacy-respecting laws, you must obtain user consent before this tracking begins.
Though there are alternate ways of ensuring user privacy, Google prescribes Consent Mode.
It allows websites or applications to send appropriate signals to Google tags for data collection while respecting user preferences.
Consent Handling: It loads Google tags prior to loading the consent banner to ensure consistent user data collection.
And all that happens while remaining legally compliant.
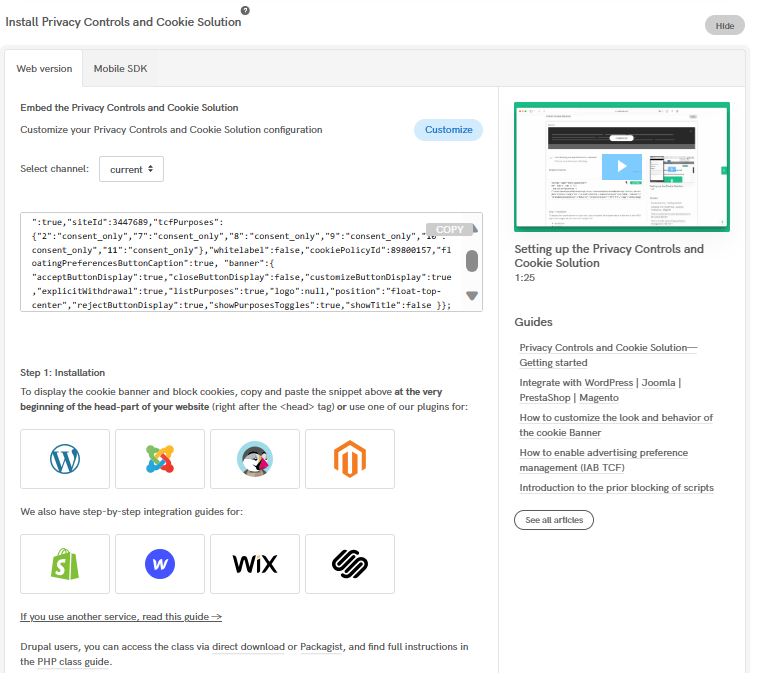
Effortless implementation: One can apply iubendas Google Tag Manager template to start instantly.
Alternatively, they also offer plugins for popular Content Management Systems (CMS) and direct site integrations.
Banner Configuration
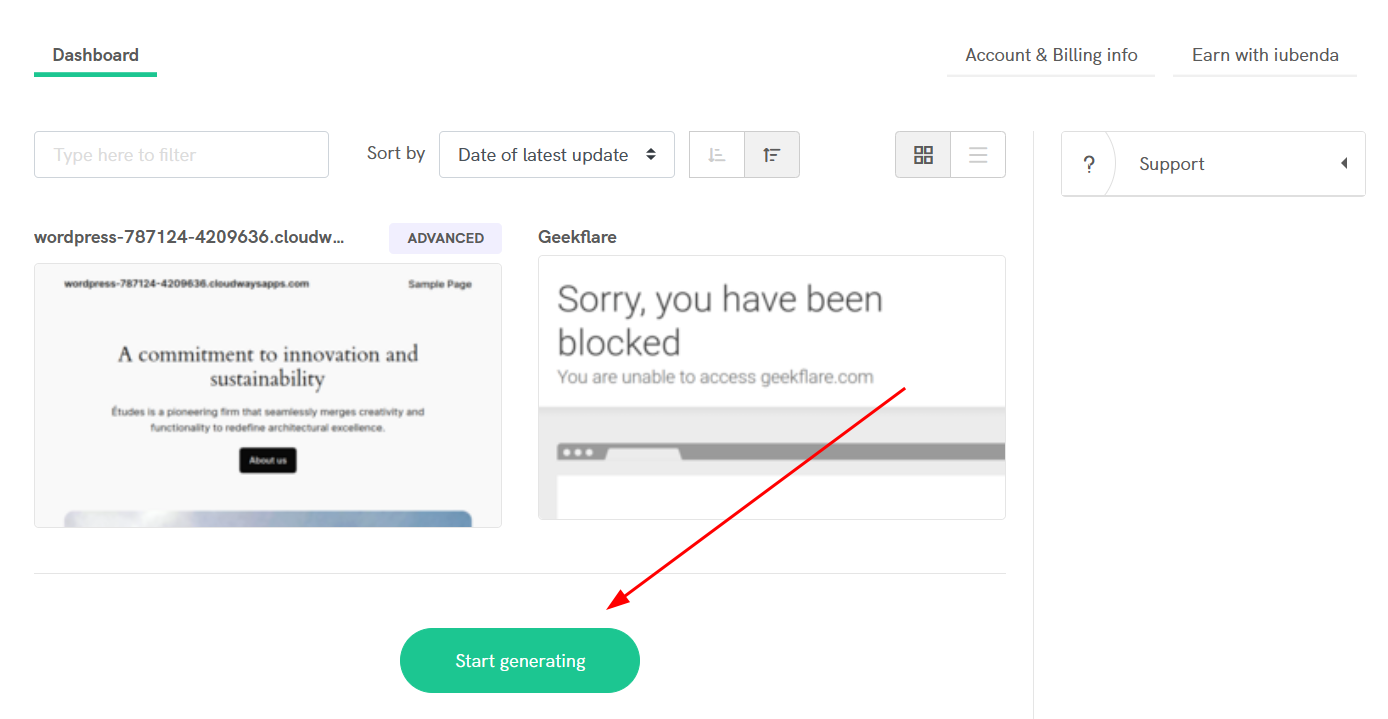
Step 1:get in to the iubenda user dashboard and clickStart generatingto begin.
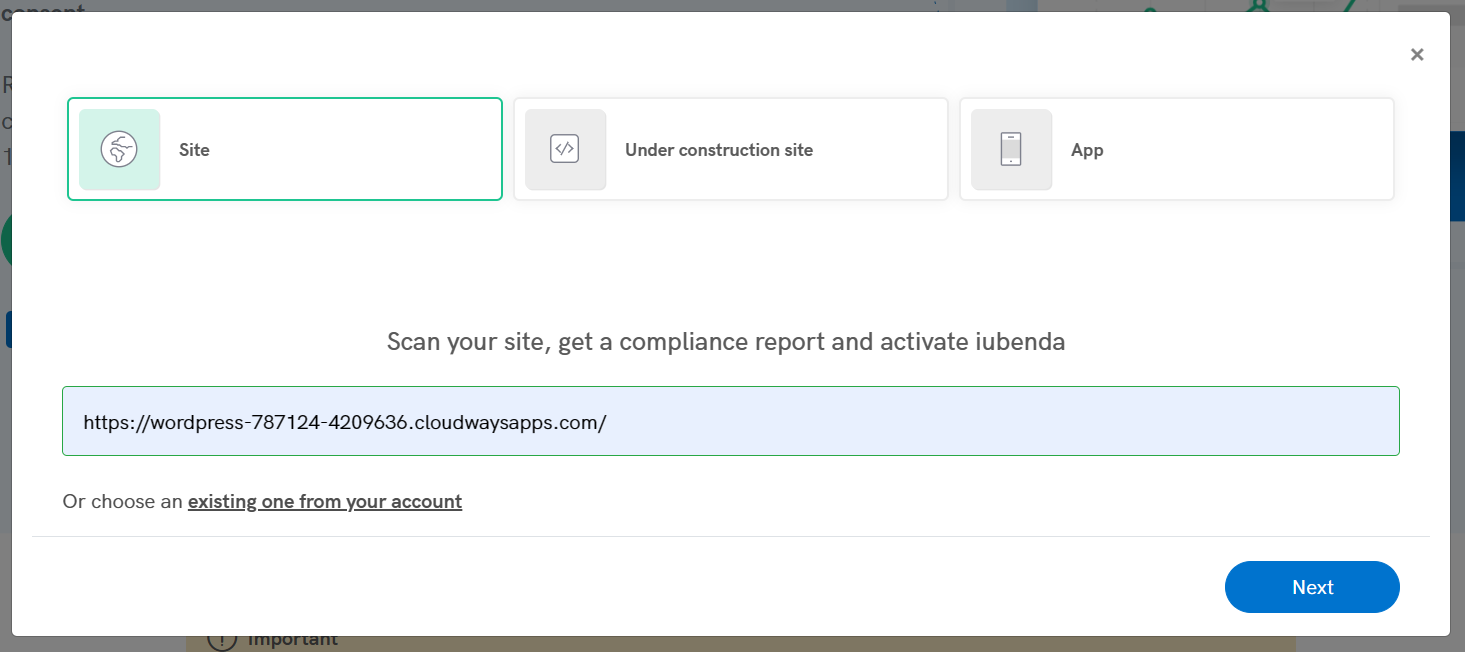
Step 2:you could enter thewebsite URLor use the already added websites for reconfiguration.
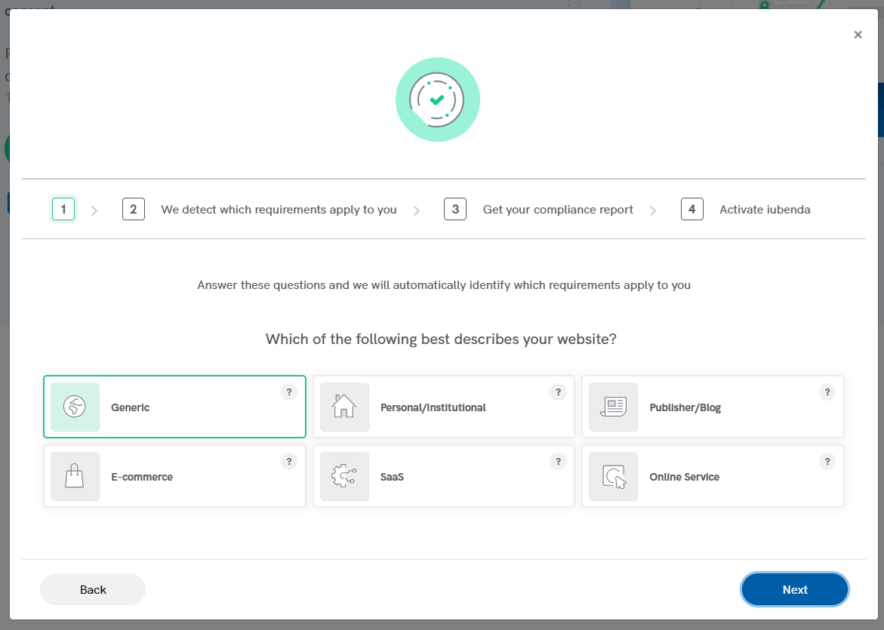
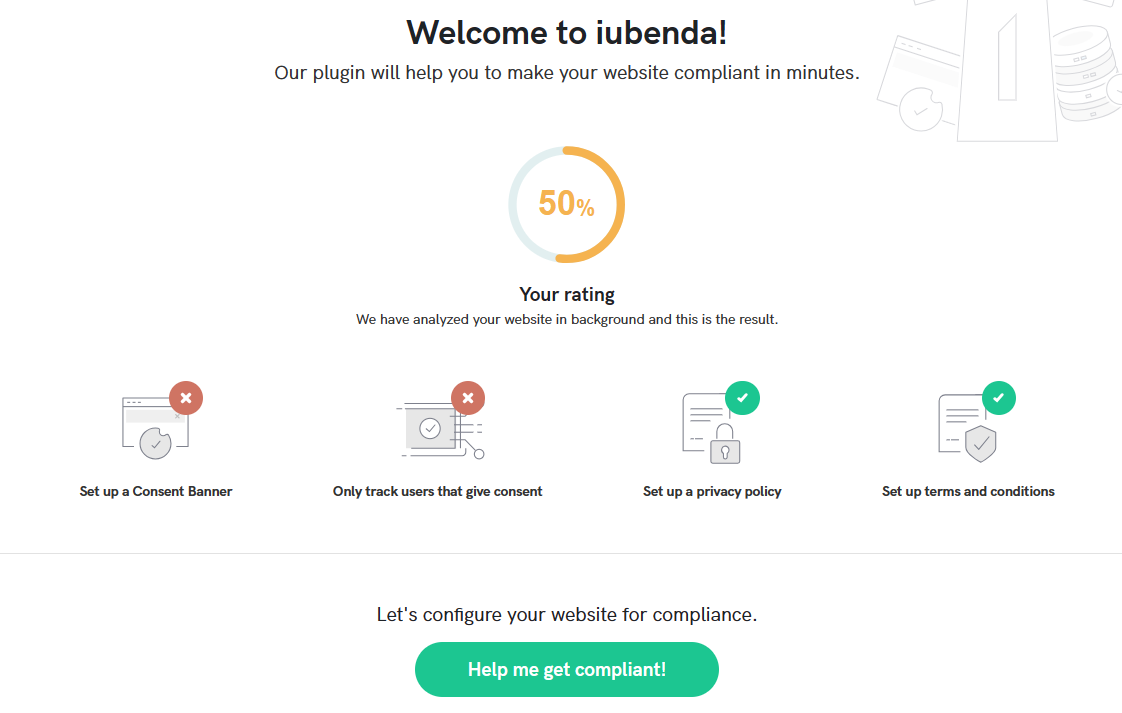
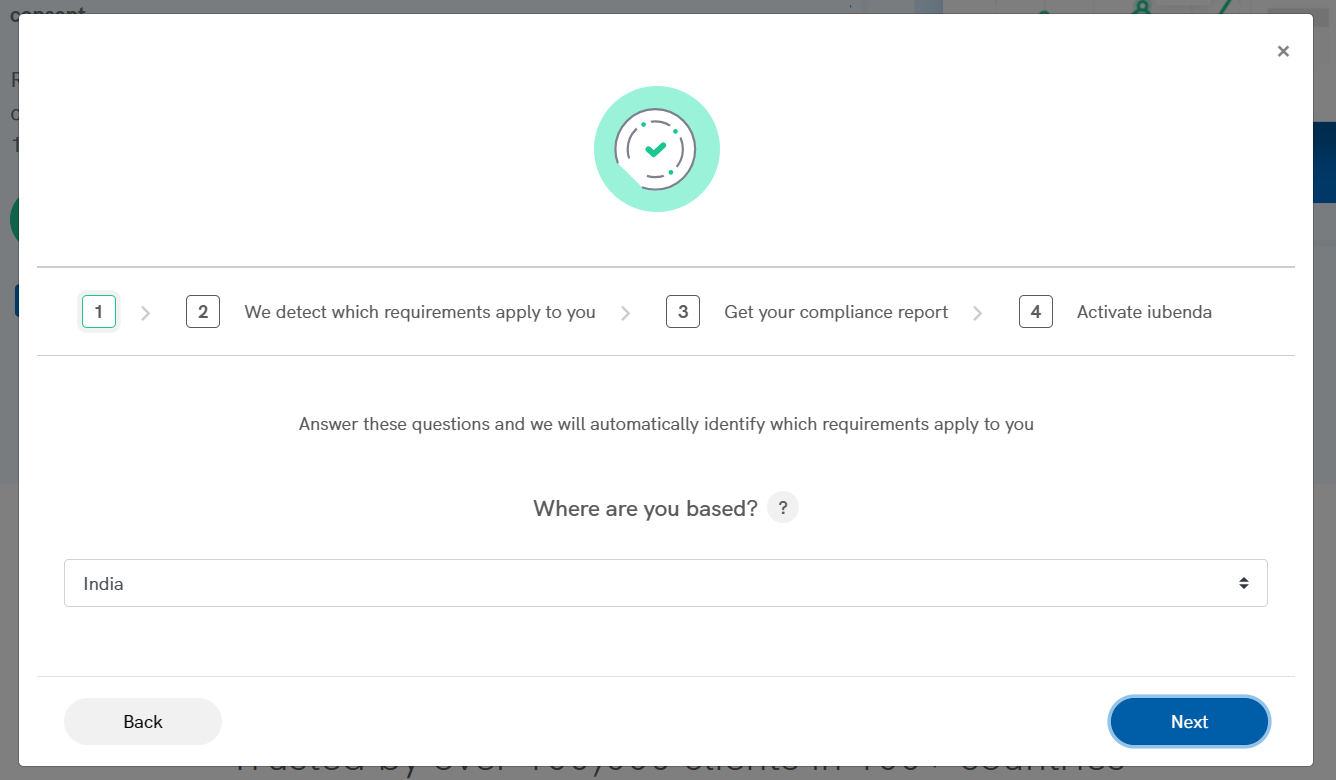
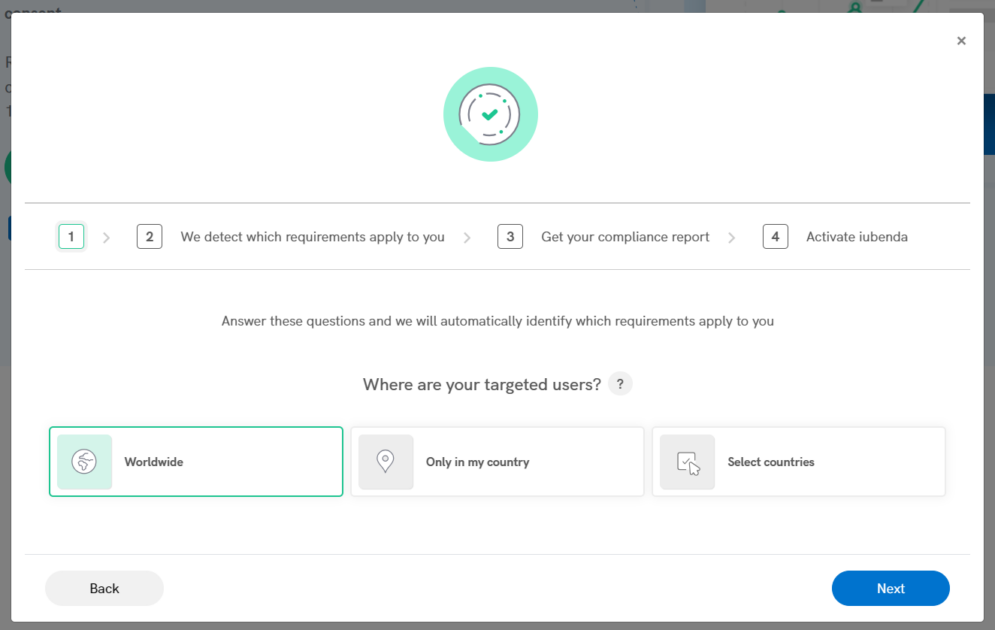
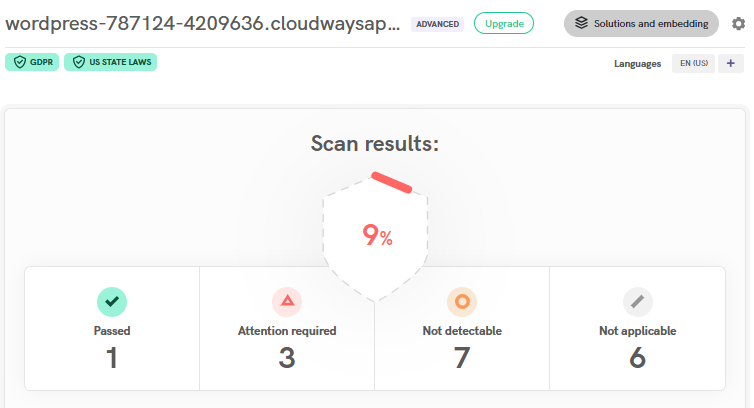
Step 5:The next step concludes the scan and shows all the fronts the subject website is lacking.
This may include a cookie banner, privacy policy, cookie policy, terms and conditions, etc.
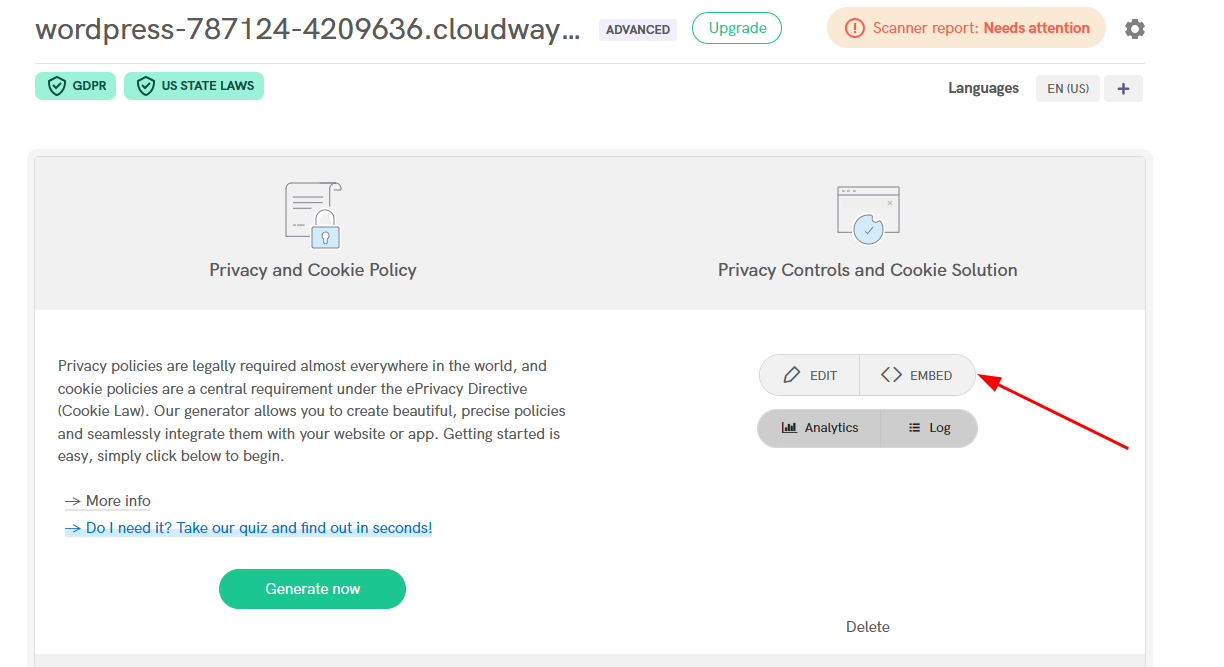
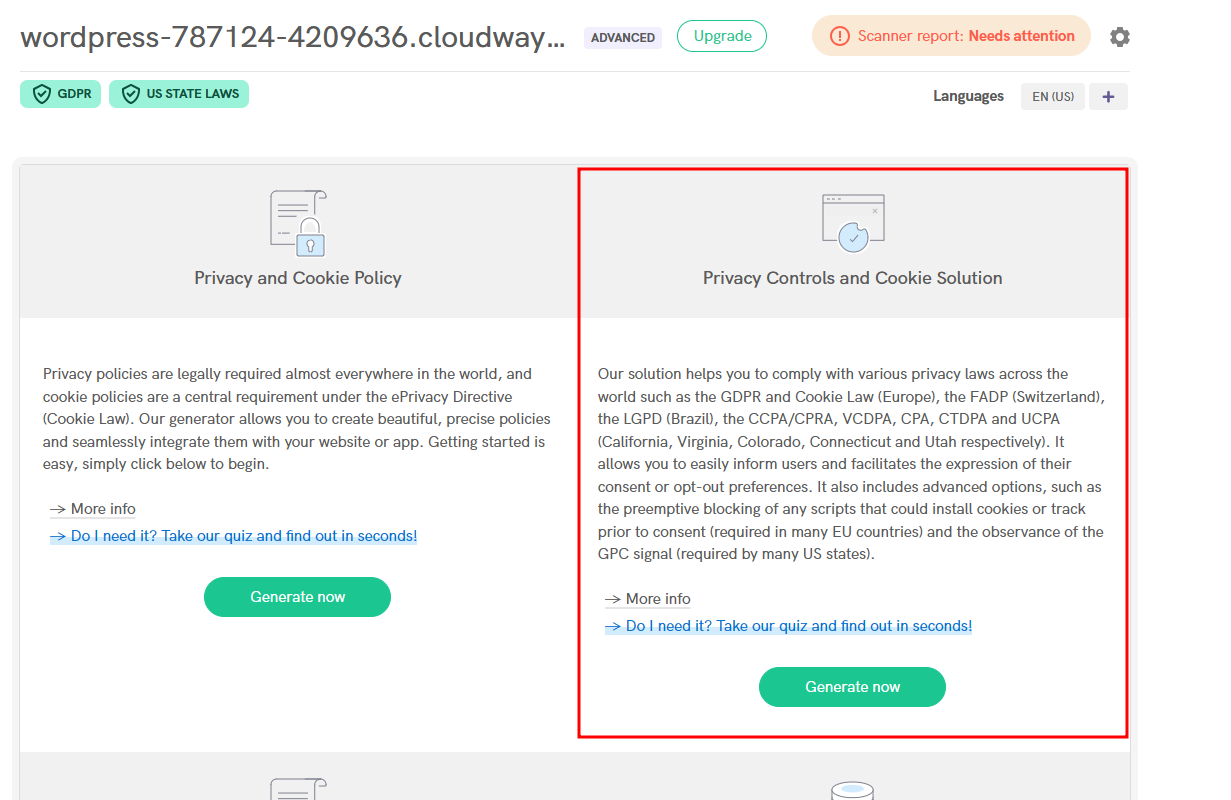
ClickSolutions and embeddingto begin configuring the cookie banner.
Step 6:This shows all the available policies you’ve got the option to implement via iubenda.
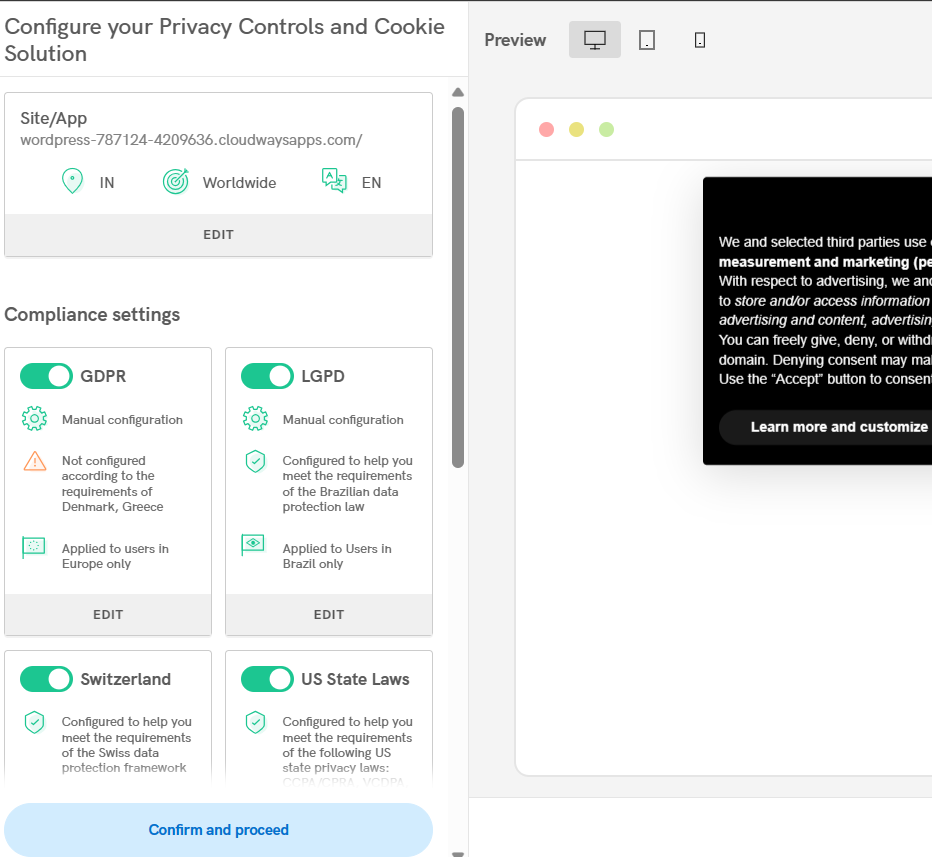
Our subject entity, cookie banner, lies underPrivacy Controls and Cookie Solution.
Step 7: The following screen indicates the banner preview and the customization options.
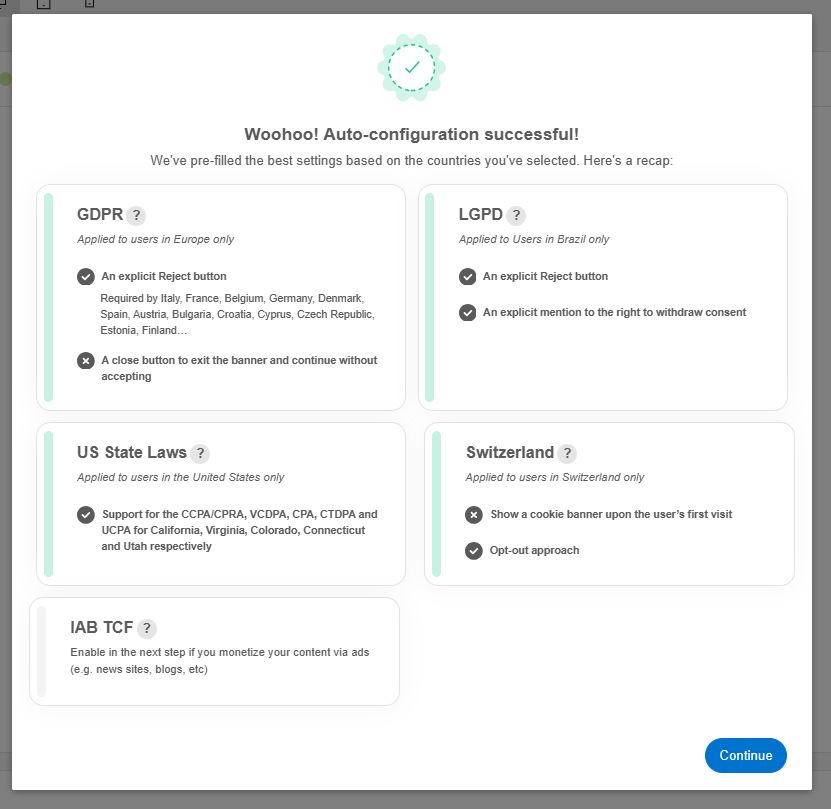
Step 8: You get the auto-configuration success pop-up.
ClickContinueto make changes and proceed.
Step 9: Everything is listed at the left panel, starting withCompliance settingsfor individual jurisdictions.
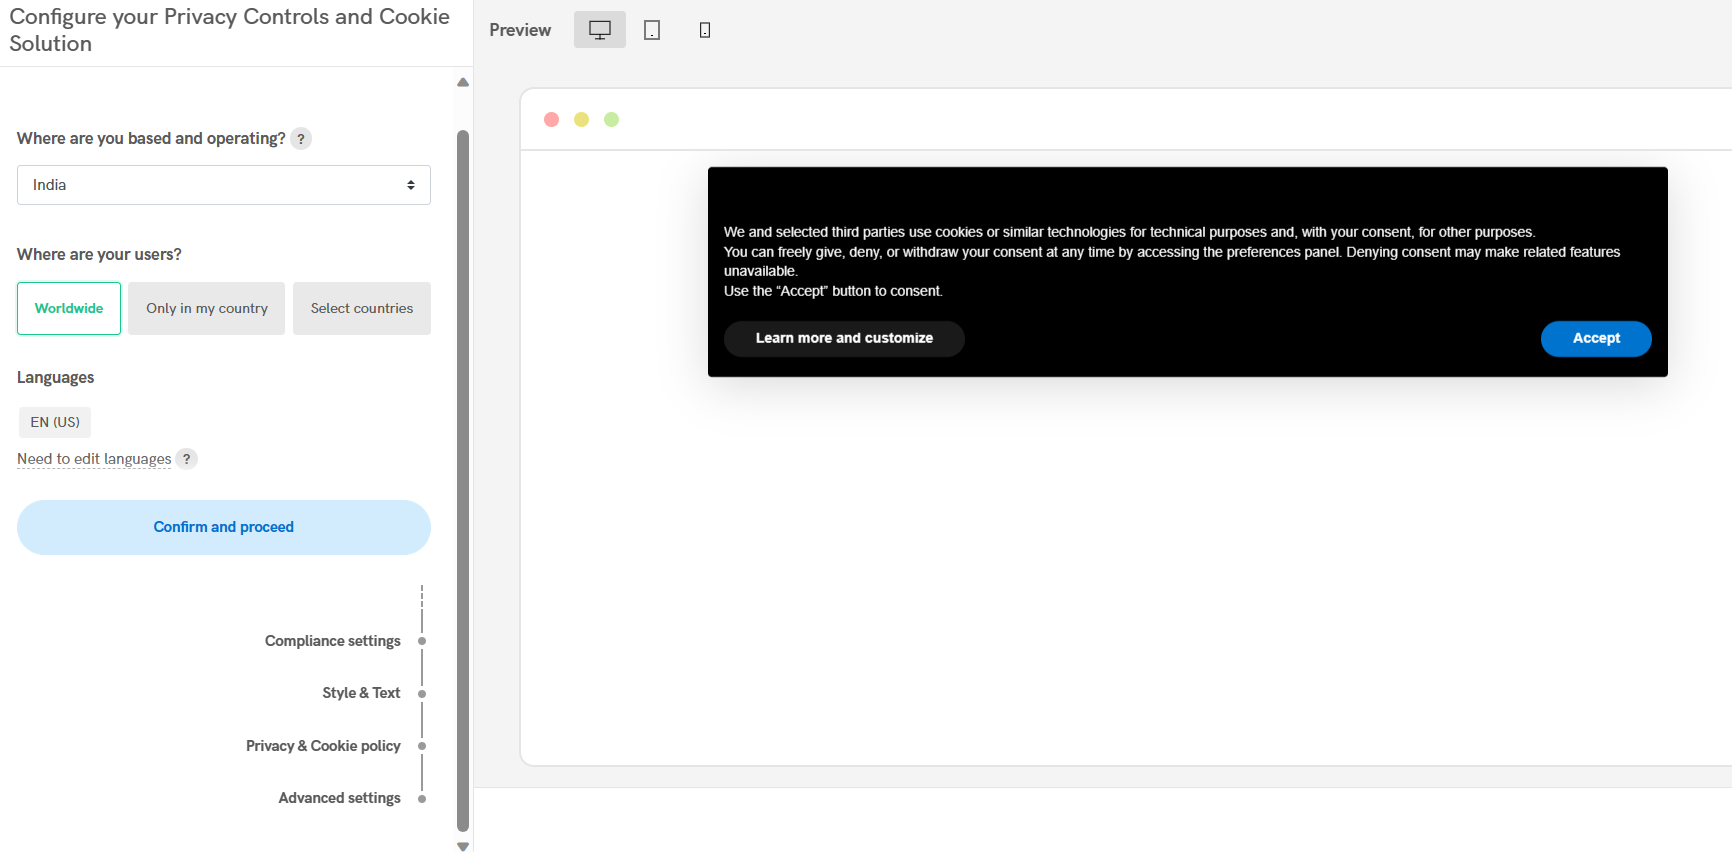
you could pick the specific configurations and also opt for automated or manual editing in each option.
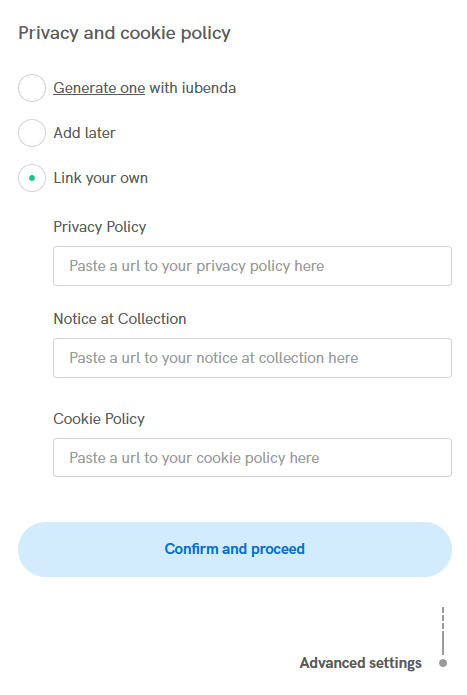
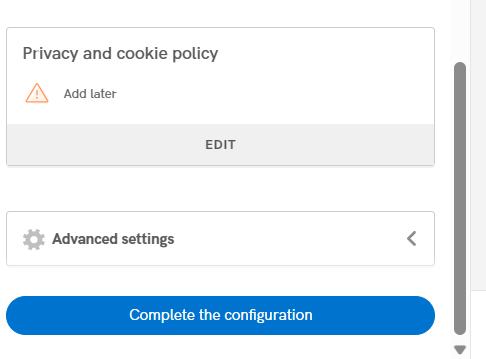
I have chosen Add Later for this demo.
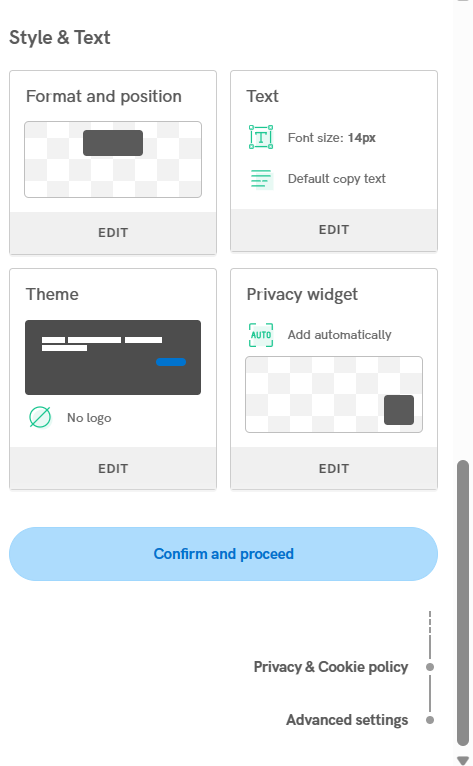
TheAdvanced settingspresent a few more customization options for banner animation, consent collection, etc.
It will help if you have a developer to tweak these options.
Alternatively, you might go through the iubenda documentation for guidance.
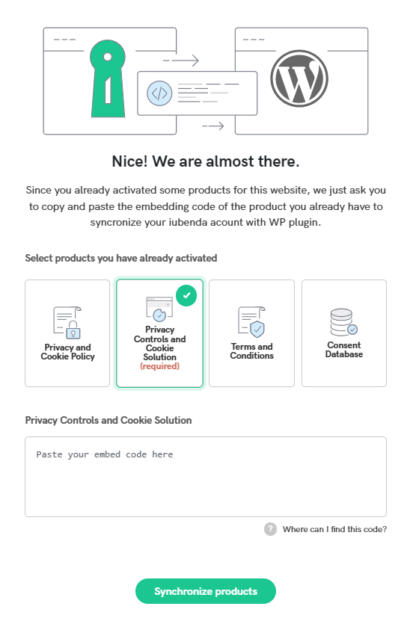
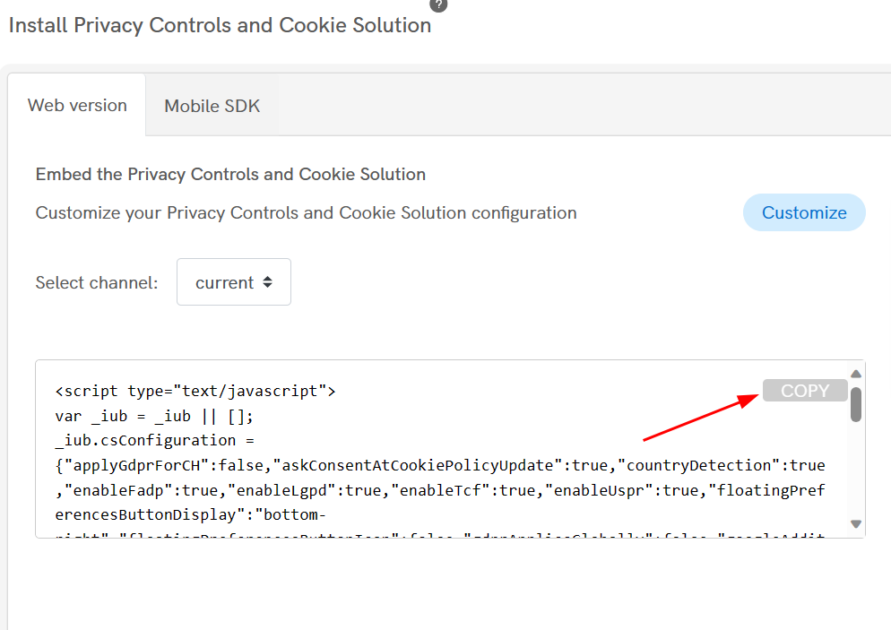
Since I was working on WordPress, I went for the official iubenda plugin for the banner integration.
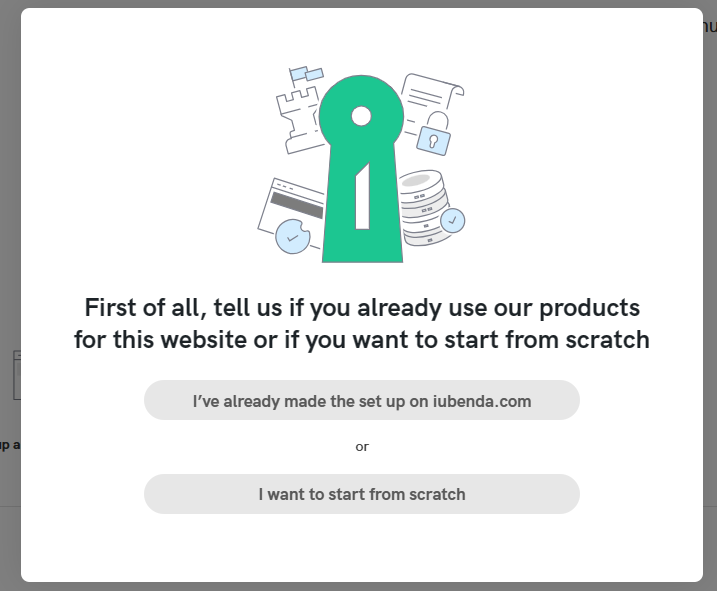
I went with the first one since I already configured at iubenda.
Finally, clickSynchronize Products.
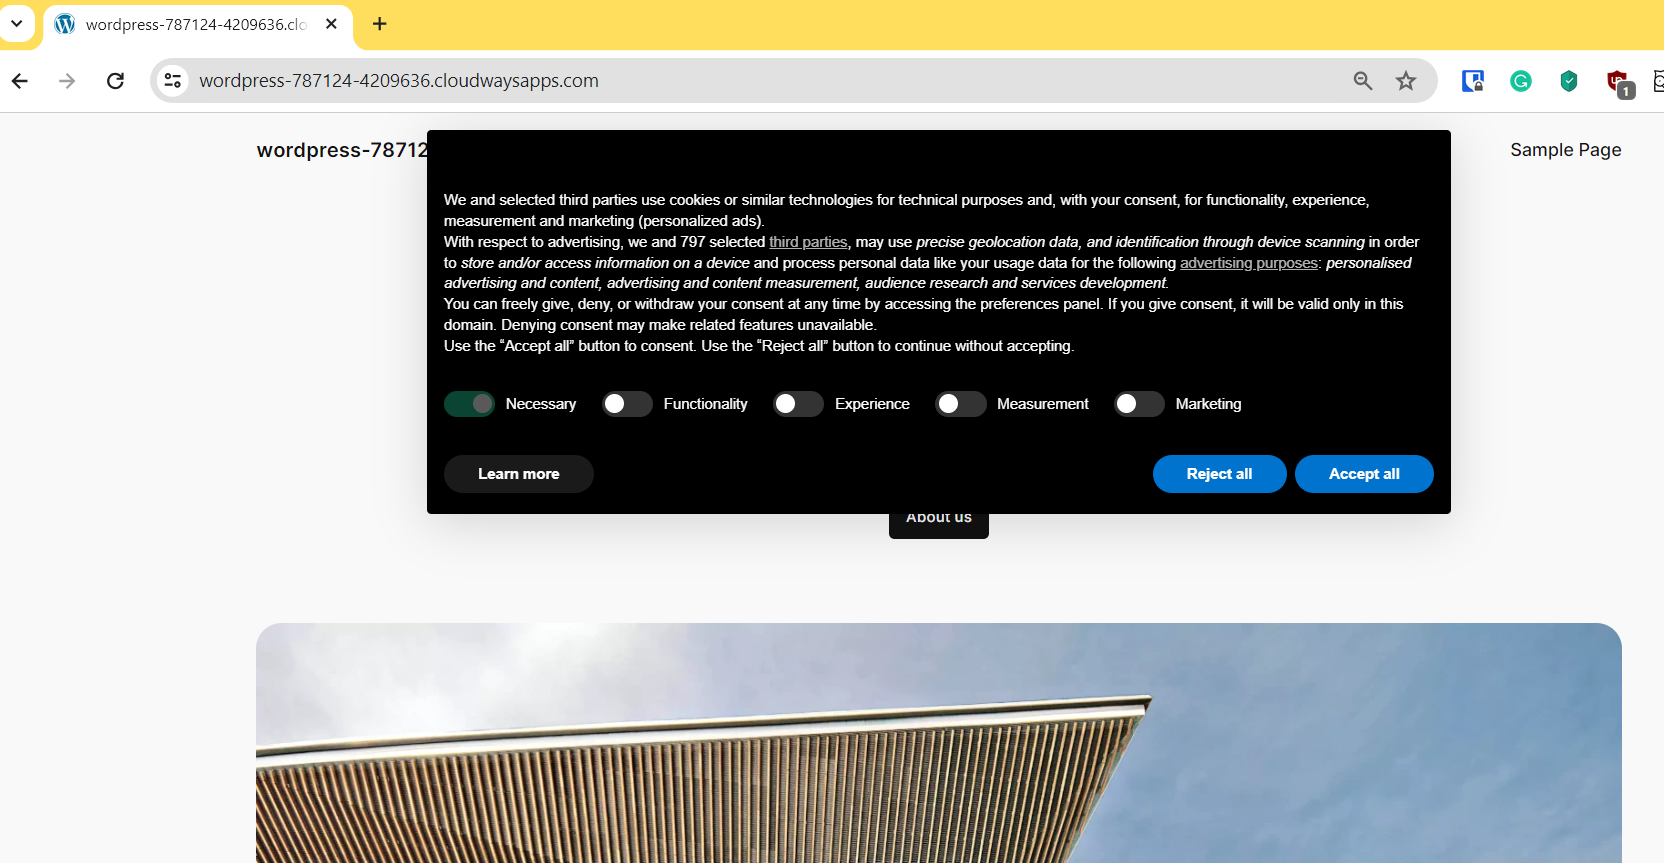
Now, you’ve got the option to see the banner on our test website.
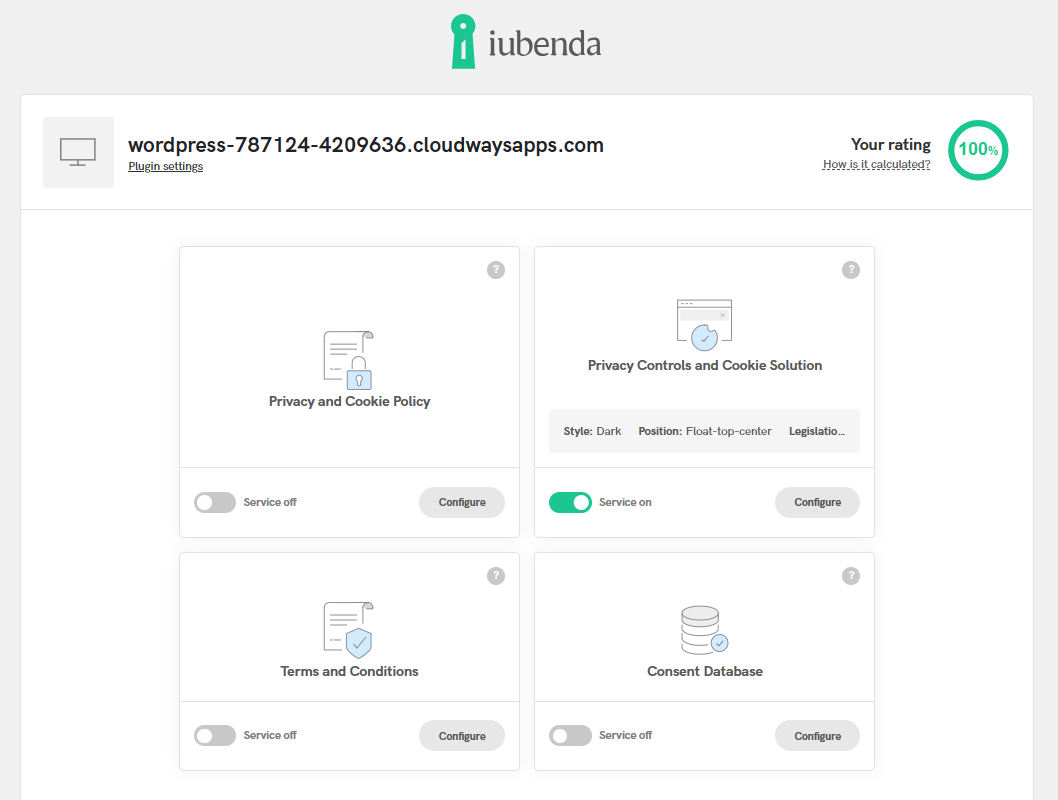
The iubenda dashboard confirms the service status.
Similarly, we can turn on other services as well.
Be Compliant!
Powered with machine learning, this helps you model non-consented user behavior while being legally compliant.
iubenda has plugins and detailed guides for popular CMS and e-commerce platforms, which makes the integration simple.
Try out to see it yourself.
More for you on Privacy